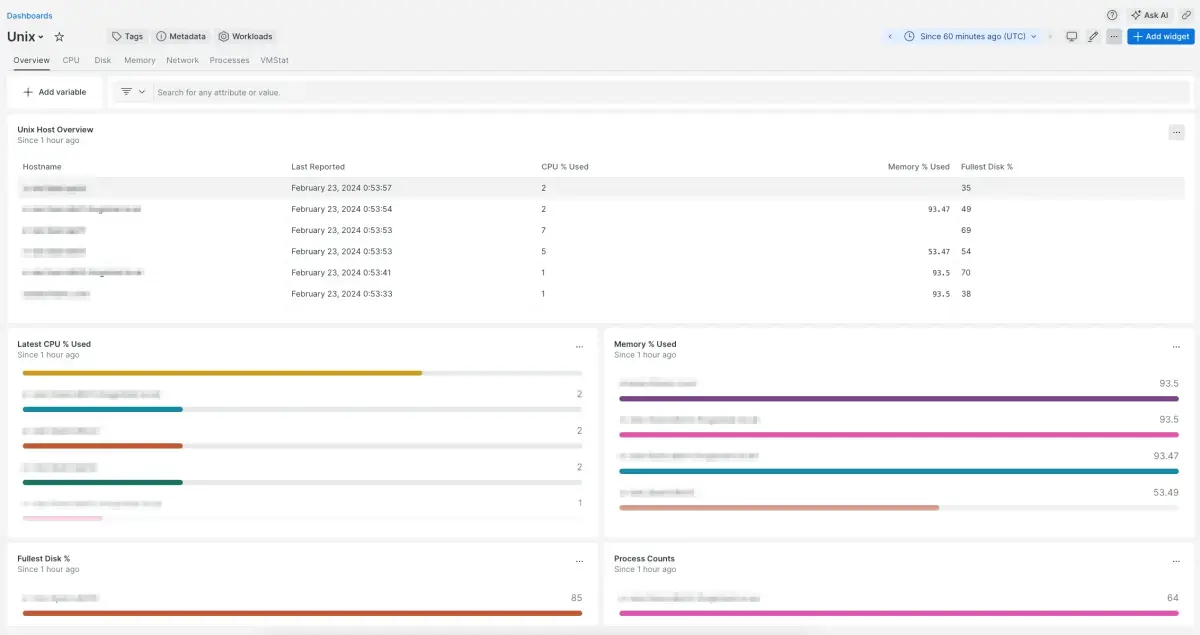
The Unix monitoring integration allows for system-level monitoring of Unix-based servers, such as AIX, Linux, macOS, and Solaris/SunOS, and reports data to New Relic.

Tip
This integration is released as open source on Github. If you encounter any issues, please log them at (https://github.com/newrelic/newrelic-unix-monitor/issues).
Install the integration
Follow the steps below to install the integration:
Check compatability and requirements
- JDK 8 and above
- AIX 7.0 and above
- HP-UX 11.0 and above
- Linux based-operating system
- OSX / MacOS 10.9 ('Mavericks') and above
- Solaris/SunOS 10.0 and above
Download and prepare the integration
Download the latest version of the Unix Monitor from the GitHub repo.
Copy the integration to the Unix server that you want to monitor and then untar it:
bash$tar -xvzf <filename.tar.gz>
Configure the integration
Open the config file
config/plugin.json.Set
account_idandinsights_insert_keyto your values. Edit the rest of the config file as needed (proxy, agent attributes, etc.).Here's an example of a complex configuration file. Yours will likely not use every config option available:
{"global": {"OS": "auto","account_id": "YOUR_NEWRELIC_ID","fedramp": "false","insights_mode": {"insights_insert_key": "YOUR_INSIGHTS_INSERT_KEY","insights_data_center": "US"},"proxy": {"proxy_host": "YOUR_PROXY_HOST","proxy_port": 5443,"proxy_username": "YOUR_PROXY_USERNAME","proxy_password": "YOUR_PROXY_PASSWORD"}},"agents": [{"name": "auto","static": {"attribute1": "attribute1_value","attribute2": 12345}}]}You can find more information about all available config options at the bottom of this doc.
Start the integration
- Run
./pluginctl.sh startfrom your terminal - Check logs in the
logsdirectory (or another directory you've configured)for errors. - Data should now flow into your New Relic account and be visable in your infrastructure UI.
Find your data
To easily find your Unix data, download our pre-built dashboard:
- Go to one.newrelic.com and click on + Integrations & Agents.
- Click on Dashboards tab.
- In the search box, search for Unix.
- Click on the Unix dashboard to install it in your account.
Integration configuration settings
The following sections explain all the configuration settings available:
Global settings
OS(default:auto): Used to determine which commands to run and how to parse them. Leave set toautoto have the plugin figure that out (which normally works).account_id: New Relic account ID. The 6 or 7 digit number in the URL when you're logged into the account of your choosing.fedramp: A true or false string to indicate that the target is the New Relic Fedramp-authorized endpoint.insights_insert_key(underinsights): You must create an Insights Insert key, as described here.insights_data_center(underinsights, default:us): If using the NR EU data center for your account, please change this toeuorEU. Otherwise, you can leave this alone or omit this setting entirely.
Agent settings
These settings are found in the agents object of your config file.
name: If set toauto, the plugin will use that server's hostname. Otherwise, sets the hostname and agentName to whatever is set here.static(optional): An object containing static attributes (as name-value pairs) you want to appear in every event from this plugin. For example:
"agents": [ { "name": "auto", "static": { "data_center": "Antartica", "customer": "Penguins", "rank": 1 } } ]Proxy settings
If using a proxy, the optional proxy object should be added to the global object in plugin.json.
- The available attributes are:
proxy_host,proxy_port,proxy_usernameandproxy_password. - The only attribute that is required in the
proxyobject isproxy_host.
Credential obfuscation
For additional security, this integration supports obfuscated values for the attributes like insights_insert_key, proxy_username, proxy_password, and any other attributes under the parent attribute 'agents'. To do so, append _obfuscated to the attribute name and provide an obfuscated value that was produced by the New Relic CLI:
Install the New Relic CLI on any supported platform. It doesn't need to be installed on the same host as the Unix integration. It is only used to generate the obfuscated keys, this integration handles deobfuscation independently.
Generate your obfuscated credentials using the following CLI command:
newrelic agent config obfuscate --key "OBSCURING_KEY" --value "CLEAR_TEXT_PROXY_PASSWORD"In this command,
OBSCURING_KEYcan be any value you want. You can point it at an existing environment variable:newrelic agent config obfuscate --key "YOUR_RANDOM_KEY!" --value "YOUR_PROXY_PASSWORD!"newrelic agent config obfuscate --key ${NEW_RELIC_CONFIG_OBSCURING_KEY} --value ${OUR_PROXY_PASSWORD}In the
proxyobject inplugin.json, populate theproxy_username_obfuscatedandproxy_password_obfuscatedattributes with the values returned by the CLI.In
pluginctl.sh, uncomment theNEW_RELIC_CONFIG_OBSCURING_KEYvariable, and set it to the same value or envrionment variable as you used in step 2 forOBSCURING_KEY.