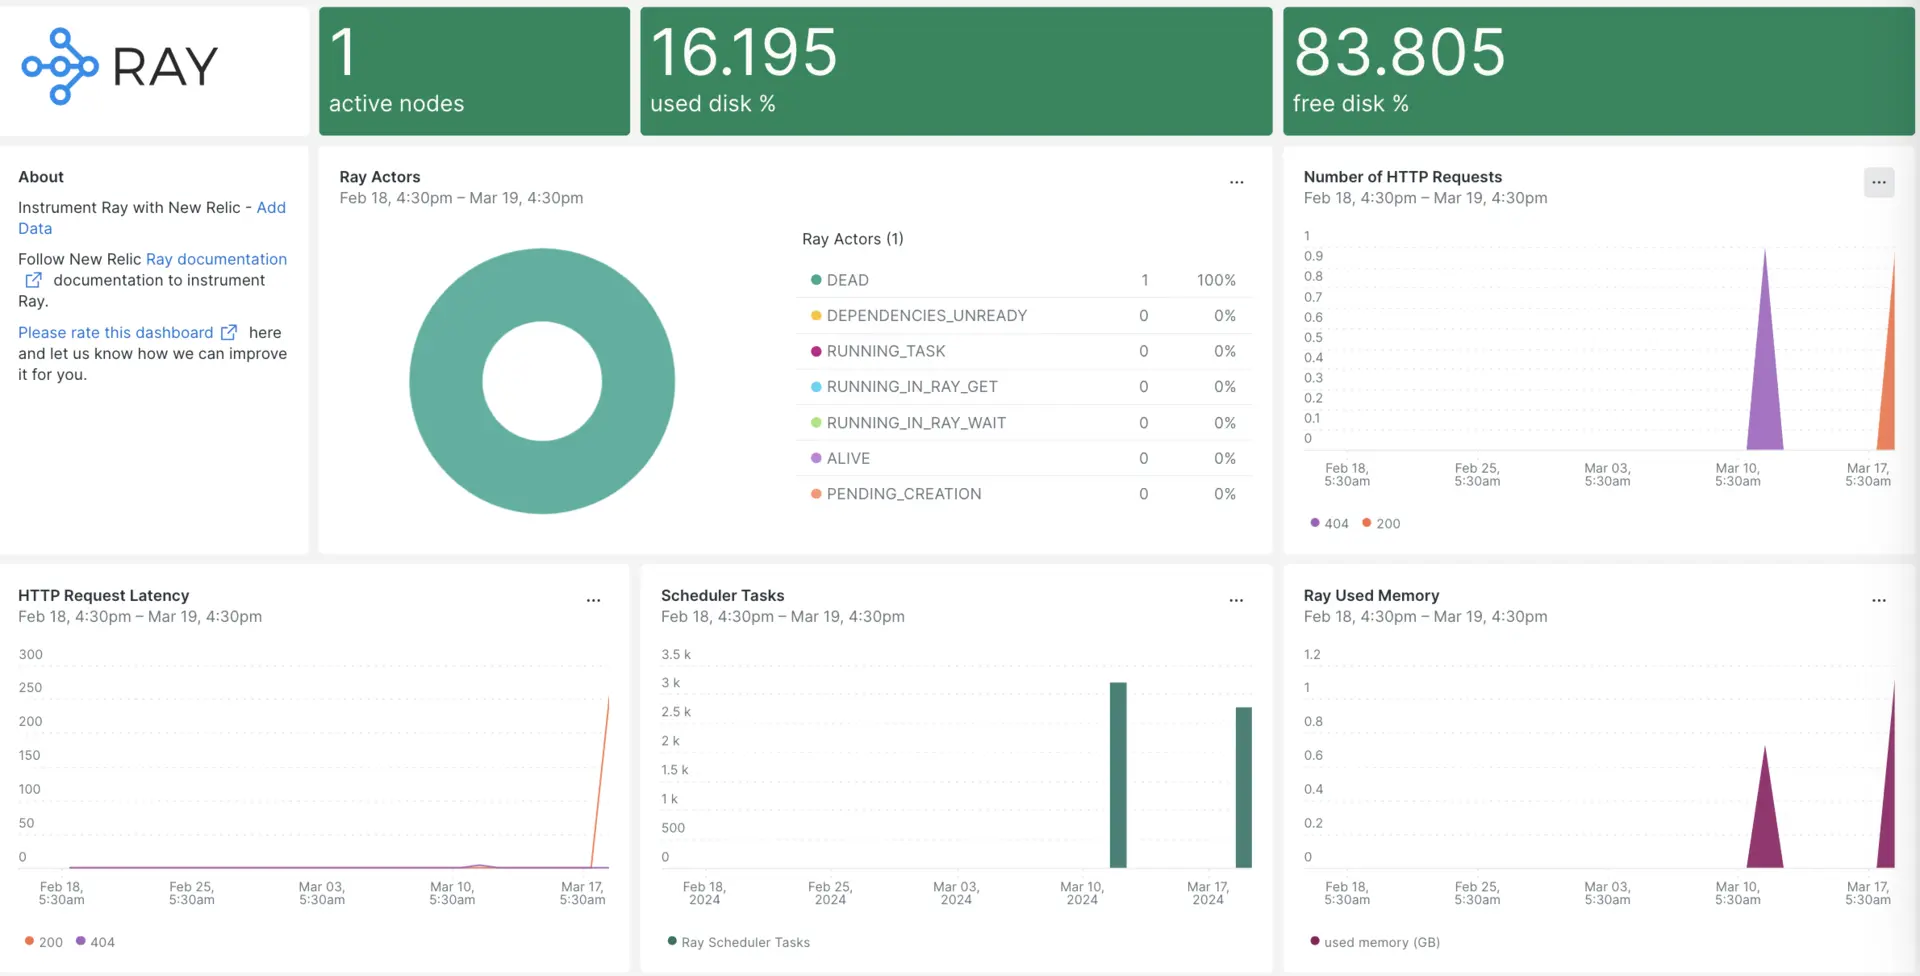
当社の Ray インテグレーションは、Ray のパフォーマンスを監視し、Ray クラスタ、データの前処理、分散トレーニング、ハイパーパラメータ調整、強化学習、モデルサービング、Python アプリケーションのスケーリングなどの ML タスクの診断と最適化を支援します。 当社の Ray インテグレーションはインフラストラクチャエージェントを活用し、NRI-Prometheus は最も重要な Ray メトリックを含む事前構築されたダッシュボードを提供します。

New Relic との統合を設定したら、すぐにこのようなダッシュボードでデータを確認できます。
インフラストラクチャエージェントをインストールします
Ray インテグレーションを使用するには、まず同じホストにインフラストラクチャ エージェントをインストールする必要があります。 インフラストラクチャエージェントはホスト自体を監視しますが、Ray インテグレーションは Ray クラスタに固有のデータを使用して監視を拡張します。
Prometheusインテグレーションをインストールする
Prometheus ダウンロード ページから最新の Prometheus リリースをダウンロードします。 ご使用のOSとアーキテクチャに適したバージョンを選択してください。 Linux の場合は、linux-amd64 バージョンを選択することになります。 tarball (
.tar.gzファイル) のダウンロード リンクをコピーします。Prometheus をダウンロードしたら、ダウンロードした tar ファイルを抽出します。
bash$tar -xvzf <filename.tar.gz>抽出した Prometheus フォルダーに移動し、以下のコマンドを実行して Prometheus サービスを開始します。
bash$cd /DOWNLOADED-FOLDER/bash$./prometheus --config.file=/tmp/ray/session_latest/metrics/prometheus/prometheus.ymlPrometheus が起動すると、ポート 9090 で動作します。 Prometheus Web インターフェースに移動し、
Statusを選択して目的の ターゲット をクリックし、以下に示すように Ray メトリックス タスク URL を表示します。http://YOUR_DOMAIN:64415/metrics, http://YOUR_DOMAIN:44217/metrics, http://YOUR_DOMAIN:44227/metrics
設定 nri-prometheus
次のパスに
nri-prometheus-config.ymlという名前のファイルを作成します。bash$/etc/newrelic-infra/integrations.dエージェントが Ray データをキャプチャできるようにする次のスニペットを
nri-prometheus-config.ymlファイルに追加します。integrations:- name: nri-prometheusconfig:standalone: false# Defaults to true. When standalone is set to `false`, `nri-prometheus` requires an infrastructure agent to send data.emitters: infra-sdk# When running with infrastructure agent emitters will have to include infra-sdkcluster_name: Ray_Metrics# Match the name of your cluster with the name seen in New Relic.targets:- description: Ray_Metricsurls: ["http://<YOUR_HOST_IP>:64747/metrics", "http://<YOUR_HOST_IP>:44217/metrics", "http://<YOUR_HOST_IP>:44227/metrics"]# tls_config:# ca_file_path: "/etc/etcd/etcd-client-ca.crt"# cert_file_path: "/etc/etcd/etcd-client.crt"# key_file_path: "/etc/etcd/etcd-client.key"verbose: false# Defaults to false. This determines whether or not the integration should run in verbose mode.audit: false# Defaults to false and does not include verbose mode. Audit mode logs the uncompressed data sent to New Relic and can lead to a high log volume.# scrape_timeout: "YOUR_TIMEOUT_DURATION"# `scrape_timeout` is not a mandatory configuration and defaults to 30s. The HTTP client timeout when fetching data from endpoints.scrape_duration: "5s"# worker_threads: 4# `worker_threads` is not a mandatory configuration and defaults to `4` for clusters with more than 400 endpoints. Slowly increase the worker thread until scrape time falls between the desired `scrape_duration`. Note: Increasing this value too much results in huge memory consumption if too many metrics are scraped at once.insecure_skip_verify: false# Defaults to false. Determins if the integration should skip TLS verification or not.timeout: 10s
Ray ログをNew Relicに転送する
ログ転送機能を使用して、Ray ログを New Relic に転送できます。
次のパスにある
logging.ymlという名前のログファイルを編集します。bash$cd /etc/newrelic-infra/logging.d/次のスクリプトを
logging.ymlファイルに追加します。- name: dashboard.logfile: /tmp/ray/session_latest/logs/dashboard.logattributes:logtype: ray_dashboard_logs- name: monitor.logfile: /tmp/ray/session_latest/logs/monitor.logattributes:logtype: ray_monitor_logs- name: log_monitor.logfile: /tmp/ray/session_latest/logs/log_monitor.logattributes:logtype: ray_log_monitor_logs
インフラストラクチャエージェントを再起動します
インフラストラクチャエージェントのドキュメントの指示に従って、インフラストラクチャエージェントを再起動します。 これはほとんどの人にとって機能する基本的なコマンドです。
$sudo systemctl restart newrelic-infra.serviceNew RelicでRayメトリックスを表示する
上記の設定を完了すると、事前に構築されたダッシュボード テンプレートを使用してメトリクスを表示できます。 このダッシュボードにアクセスするには:
one.newrelic.com > + Integrations & Agentsに移動します。
Dashboards [ダッシュボード]タブをクリックします。
検索ボックスに
Rayと入力します。それを選択し、 Install [インストール]をクリックします。
Apache Druidクイックスタートを計測し、メトリクスとアラートを確認するには、Install now [今すぐインストール] ボタンをクリックして 、Ray クイックスタート ページ にアクセスすることもできます。
Ray クラスター内のアクティブなノードを確認するクエリの例を次に示します。
SELECT latest(ray_cluster_active_nodes) FROM Metric
次は何ですか?
NRQL クエリの作成とダッシュボードの生成の詳細については、次のドキュメントをご覧ください。
- 基本的なクエリと高度なクエリを作成するためのクエリ ビルダーの概要。
- ダッシュボードをカスタマイズしてさまざまなアクションを実行するためのダッシュボードの概要。
- ダッシュボードを管理して、ダッシュボードの表示モードを調整したり、ダッシュボードにコンテンツを追加したりします。