このドキュメントでは、次の方法について説明します。
- 1 つまたはいくつかの正常なアプリケーション/サービスを維持する
- ソフトウェアスタック内で最もリスクの高い脆弱性を特定する
- 日常のワークフローでセキュリティ チームのタスクを明確にすることで、少ない労力でより安全なソフトウェアを簡単に提供できます。
このワークフローが気に入らない場合は、セキュリティ チームとしての脆弱性の管理に関するドキュメントをご覧ください。
アプリケーションの脆弱性の健全性を維持する
脆弱性データが New Relic に流入し始めると、さまざまな範囲のビューからデータにアクセスできます。
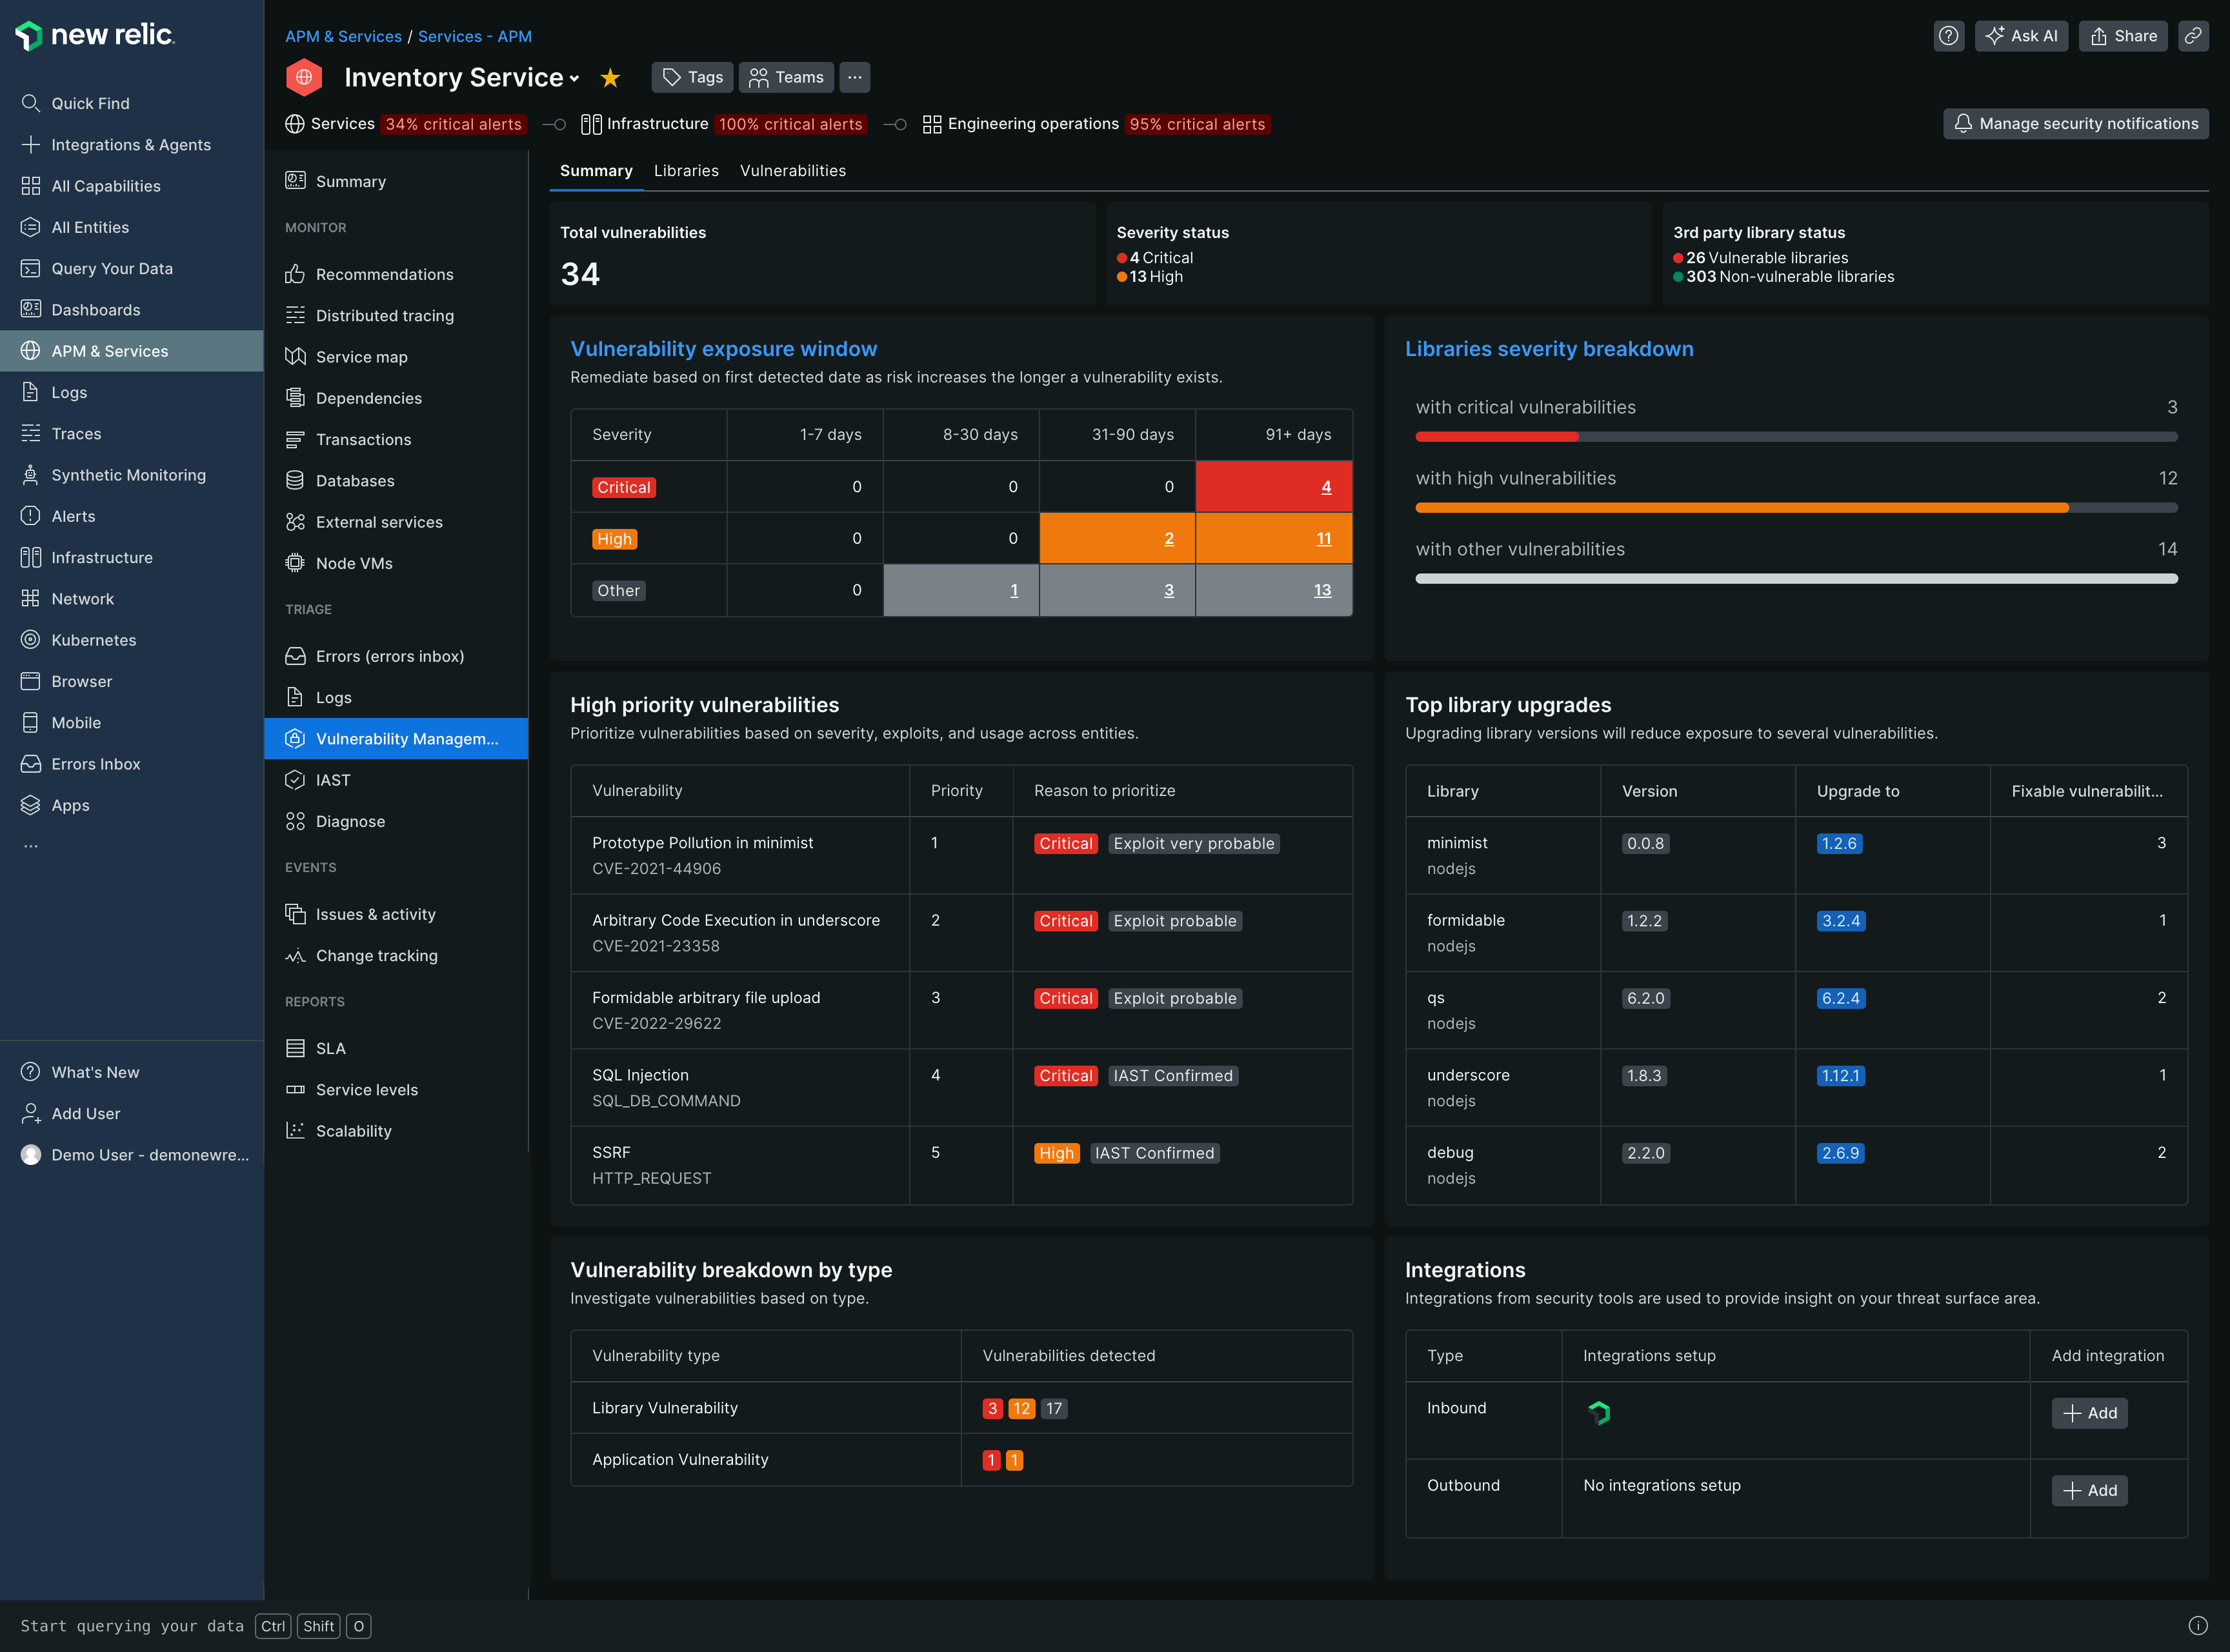
特定のアプリケーションまたはサービスの正常性を監視するには、 one.newrelic.com > All capabilities > APM & services > (select an entity) > Security RX > Overviewに移動してエンティティ スコープのビューを使用します。 より広い範囲については、 「セキュリティ チームとしての脆弱性の管理」を参照してください。

one.newrelic.com > All capabilities > APM & services > (select an entity) > Security > Overview
エンティティの Security RX 概要ページでは、アプリケーションまたはサービスのセキュリティの概要を確認できます。 キュレーションされたダッシュボードでは、次のようなアプリケーションまたはサービスの全体的なセキュリティが提供されます。
- 脆弱性の総数
- 脆弱性露出期間
- 優先度ランキングによる上位5つの脆弱性
- 脆弱性の種類別内訳
- ライブラリの重大度の内訳
- トップライブラリのアップグレード
脆弱性をトリアージ、優先順位付け、修復する
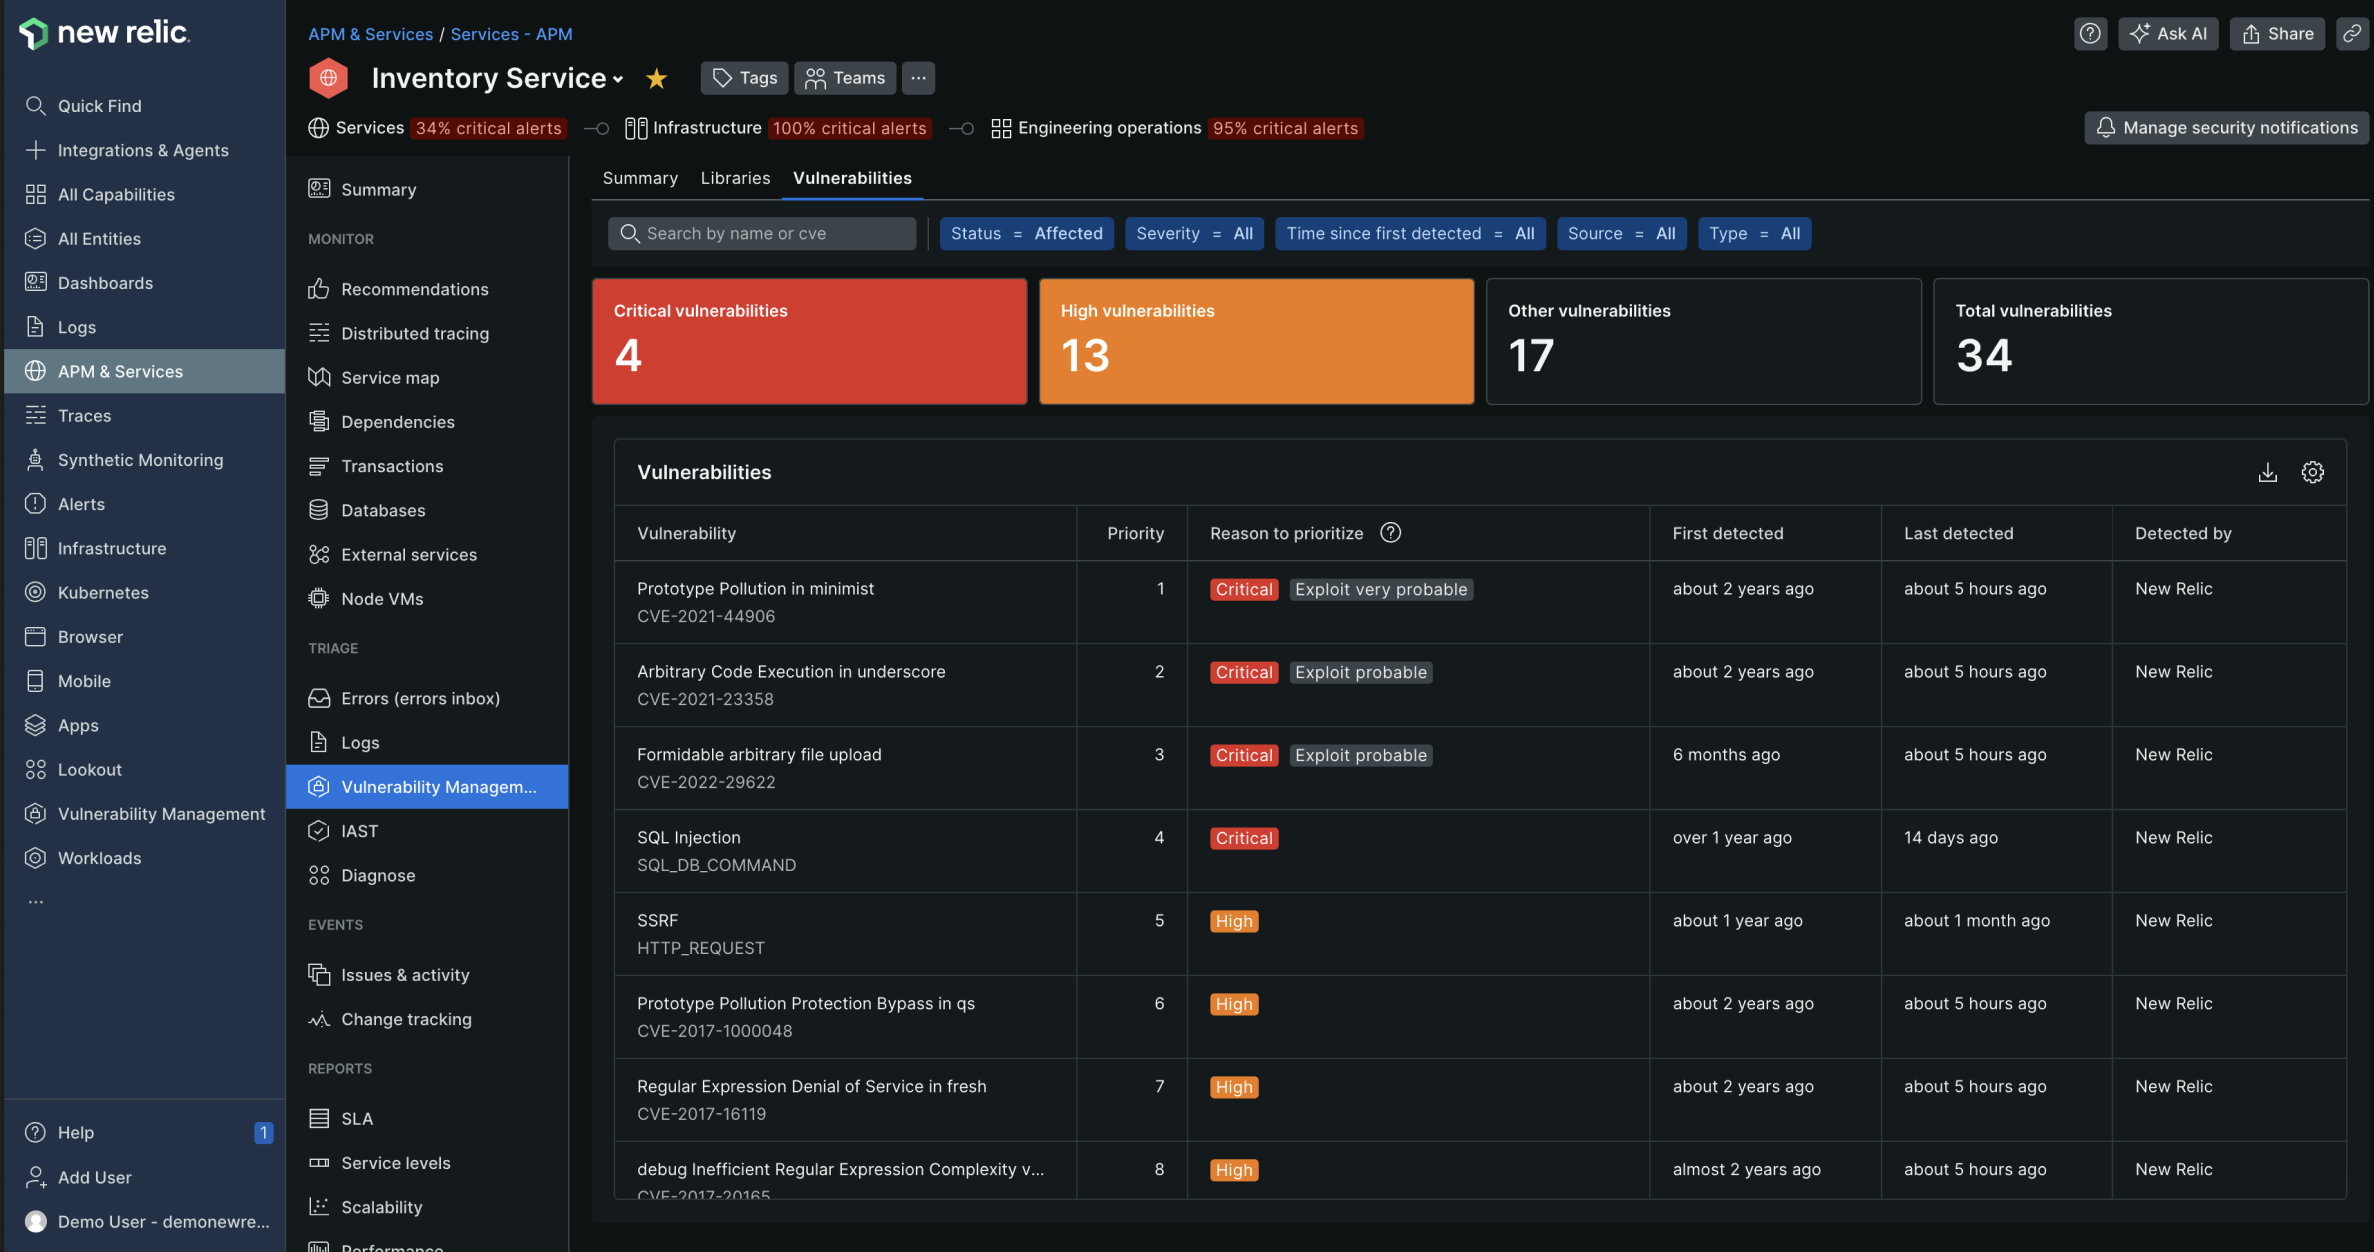
サービスまたはアプリケーションのすべての脆弱性を表示するには、左側のナビゲーション ペインのSecurity RX[セキュリティRX]セクションで、 Vulnerabilities選択します。

one.newrelic.com > All capabilities > APM & services > (select an entity) > Vulnerabilities
このページには、オープンな脆弱性がすべて表示され、優先度、重大度、影響を受けるエンティティの数、影響を受けるエンティティのタイプ、ソースなどのプロパティによってフィルタリングできます。 特定の脆弱性をクリックすると、その重大度、ソース、脆弱性ステータスの変更ログなどの詳細情報が表示されます。