NerdGraph is our GraphQL API you can use to query data and make configuration changes in New Relic features. You can send GraphQL to the NerdGraph API in a variety of ways: from your code, with curl or CLI requests, and in the NerdGraph API explorer. The explorer is a GUI GraphQL tool (based on GraphiQL) where you can experiment with queries and mutations (changes) in NerdGraph.
If you're new to GraphQL, get acquainted with the GraphQL API via the NerdGraph API explorer. If you need an overview of the API before starting this tutorial, check out Meet NerdGraph: our GraphQL API.
Set up the NerdGraph API explorer
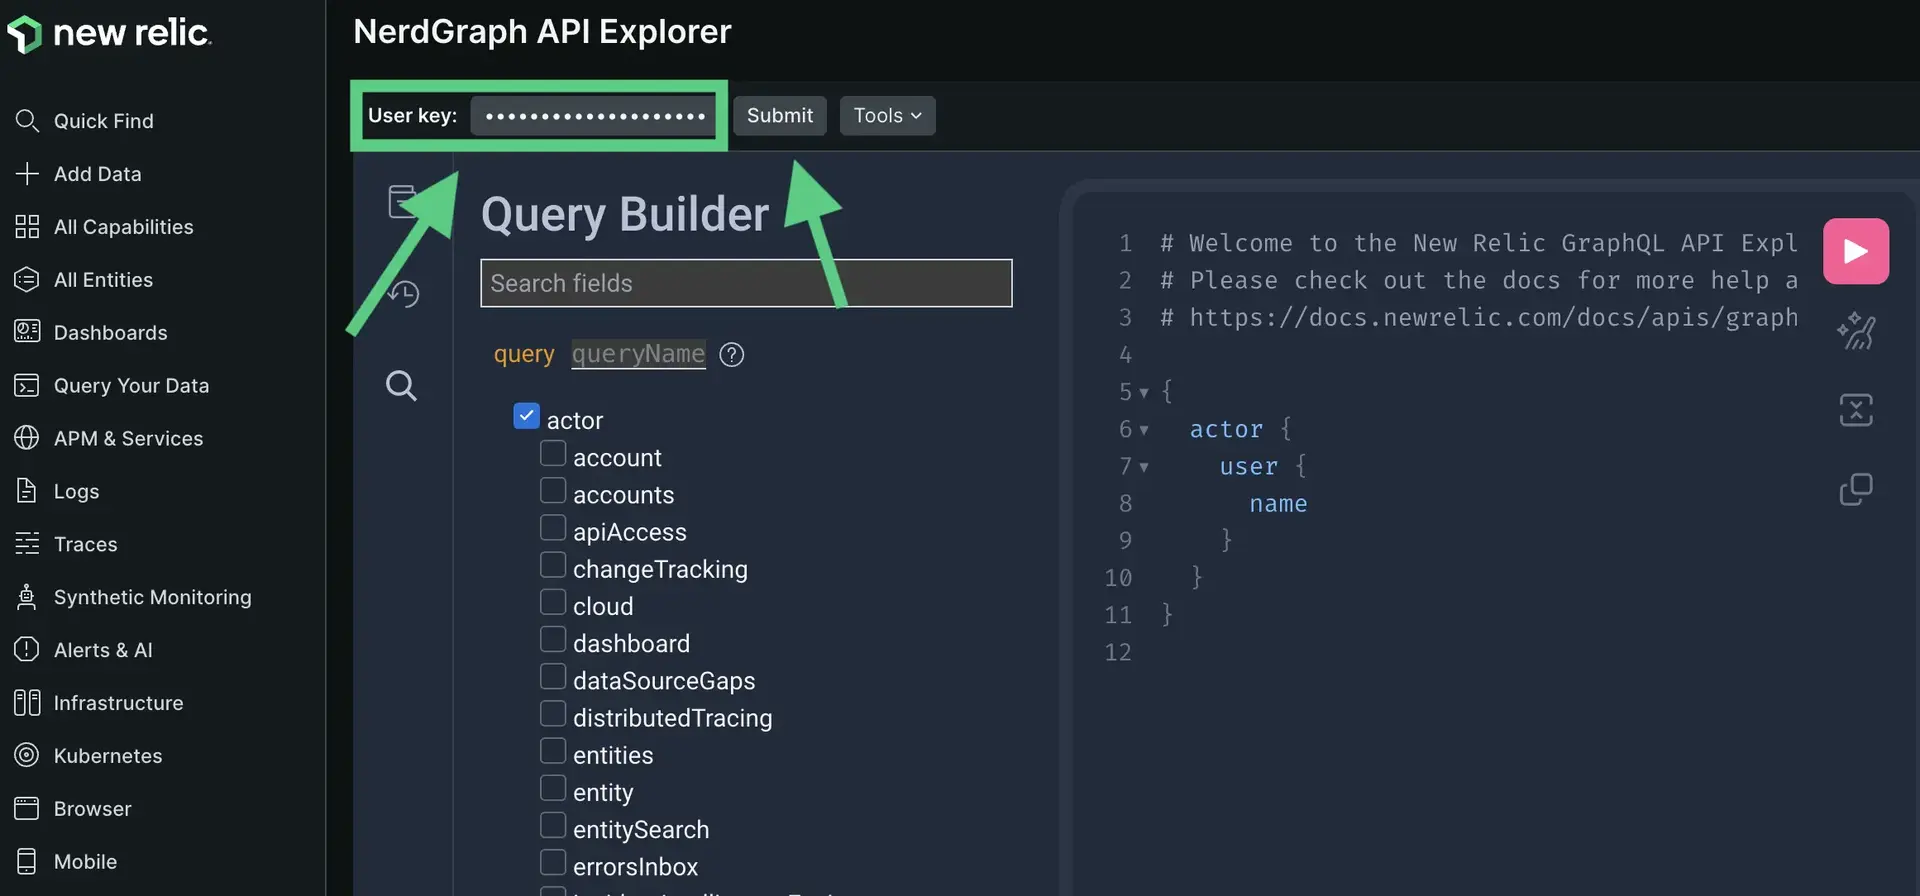
Go to one.newrelic.com > All capabilities > Apps > NerdGraph API explorer.
In the User key field, enter an API user key and click Submit. You will need to copy a key from the API Key UI.

Build a query to retrieve your name
Let's start with a simple NerdGraph query to search for your name in the GraphQL API.
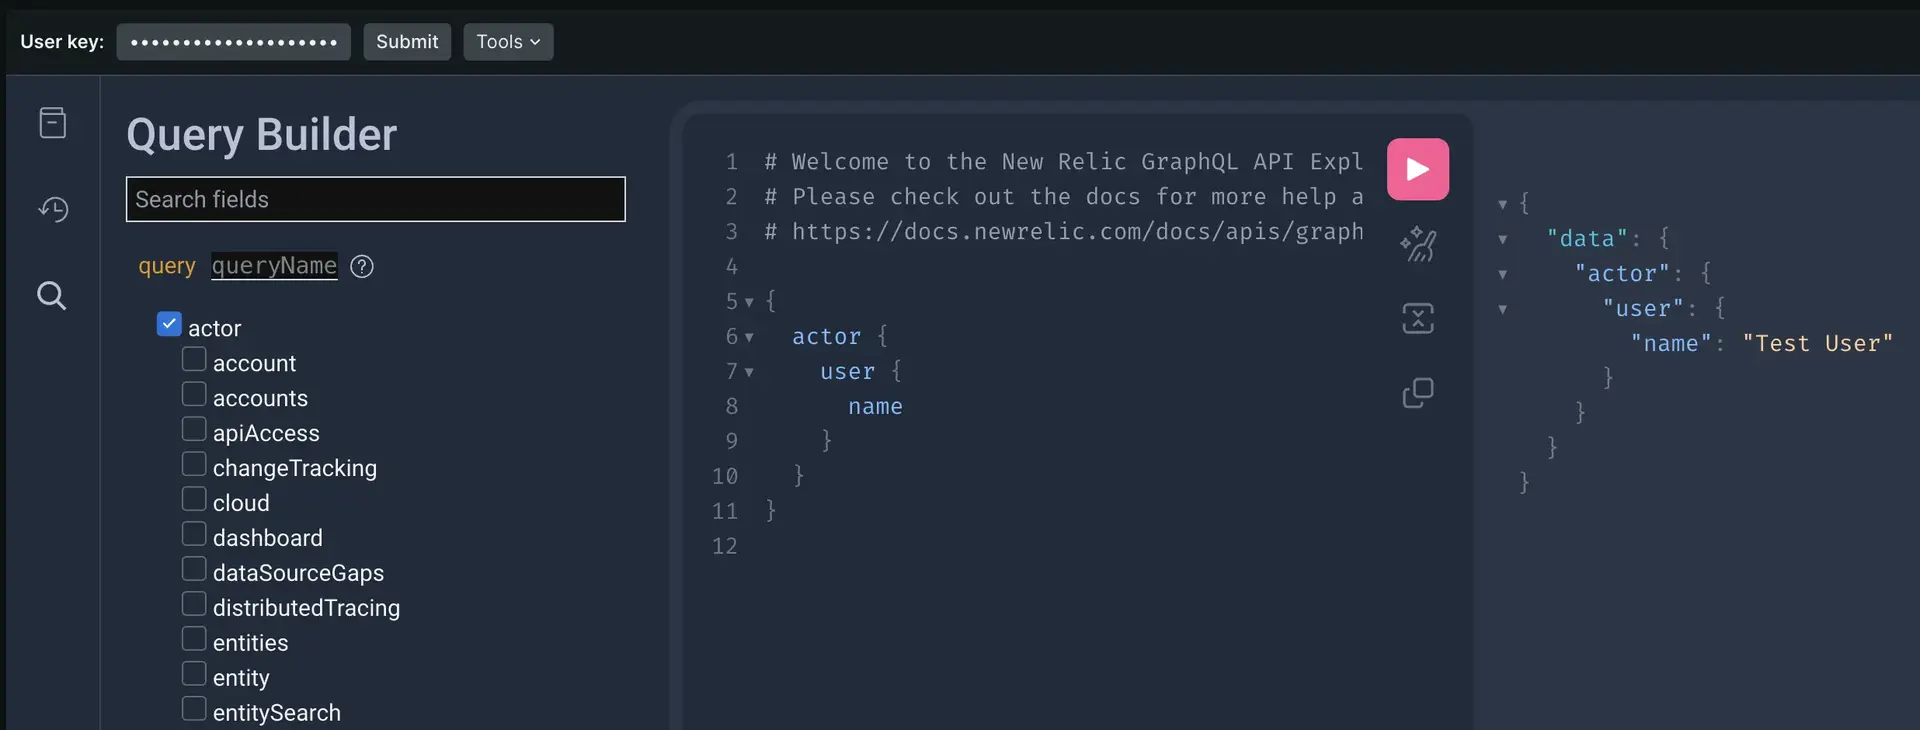
If you don't see the default query below, erase everything in the query editor, and select these fields in the query explorer in this order: actor, user, name:
{ actor { user { name } }}With this query, you're asking NerdGraph to retrieve the name field, which is nested within the user field. The user field refers to the owner of the user key, and user is nested within actor (the top-level entry into all data that is scoped to the API user's access level).
Execute the query
Click the red Execute query button. Note that the results have almost the same shape as the request. All the fields in the query builder make up the GraphQL schema, which describes all the available data types and their attributes. To learn more about each field, click the magnifying glass icon next to the field.

Add more fields to your query
Now you can try adding more fields to your query. The simplest way is clicking the fields in the query builder. The explorer knows where to put the attributes in the query. In the example, add the following fields:
Account
id(You can find the value for this by clicking on your name in the lower-left corner and then clicking API Keys)emailWhen you run the query, it returns only the data you need, without over-fetching or under-fetching data. Notice that the
idfield has an argument: passing arguments is a powerful way of customizing your NerdGraph queries. Every field and object can contain arguments, so instead of running multiple queries, you just compose the one that you need.{actor {user {nameemail}account(id: INSERT_YOUR_OWN_ACCOUNT_ID)}}
Experiment with mutations
In GraphQL, mutations are a way to execute queries with side effects that can alter the data by creating, updating, or deleting objects (in REST APIs, these are commonly referred to as CRUD operations).
Ready for your first mutation?
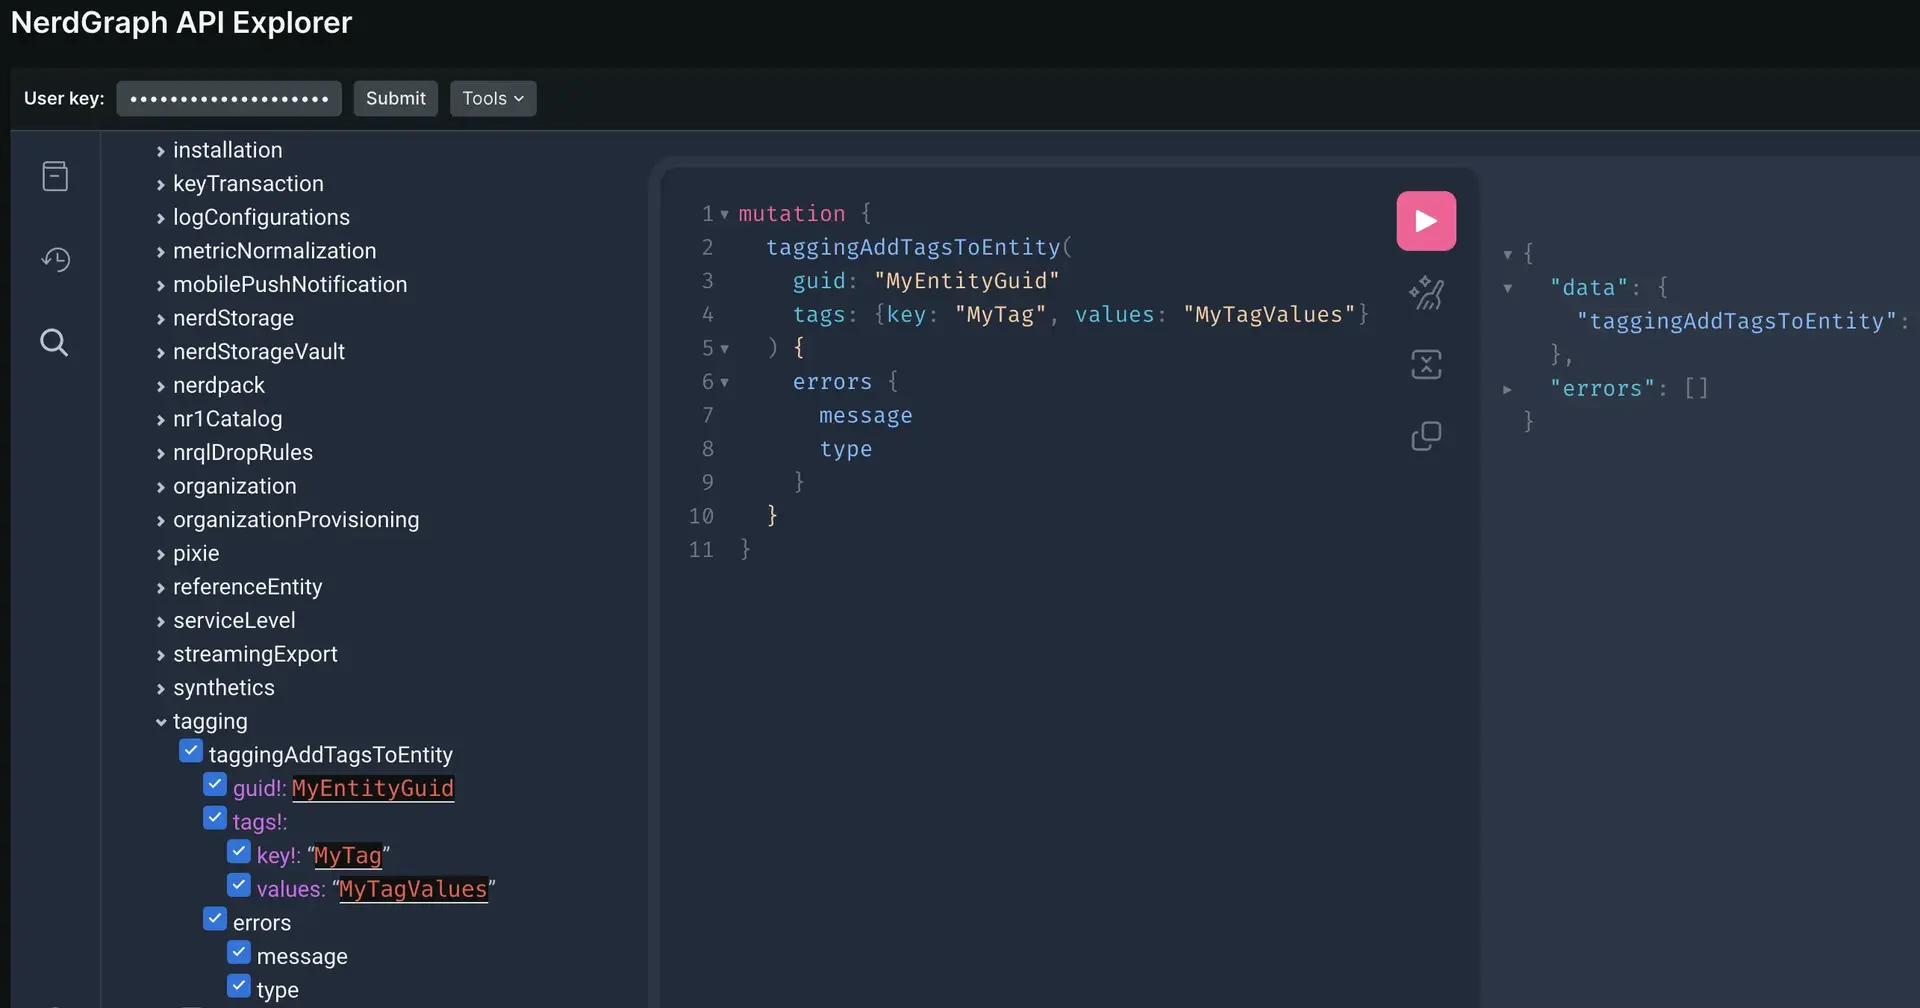
Erase what's in the editor.
Scroll down the query builder and expand
mutation.Scroll down to
taggingand selecttaggingAddTagsToEntity.Select the following fields:
guid!:(You can find this by opening All entities, clicking the ... icon in your entity record, and the clicking See metadata & tags)tags!:key!:values:
errorsmessagetype

When you add a custom tag to an entity, you must select the
errorsfield. Otherwise, the editor displays an error.팁
Unlike REST, GraphQL APIs like NerdGraph can return partial responses. For example, if you try adding tags to multiple entities, some mutations can fail and others succeed; all is logged in the GraphQL response you get.
Try your NerdGraph query in the terminal
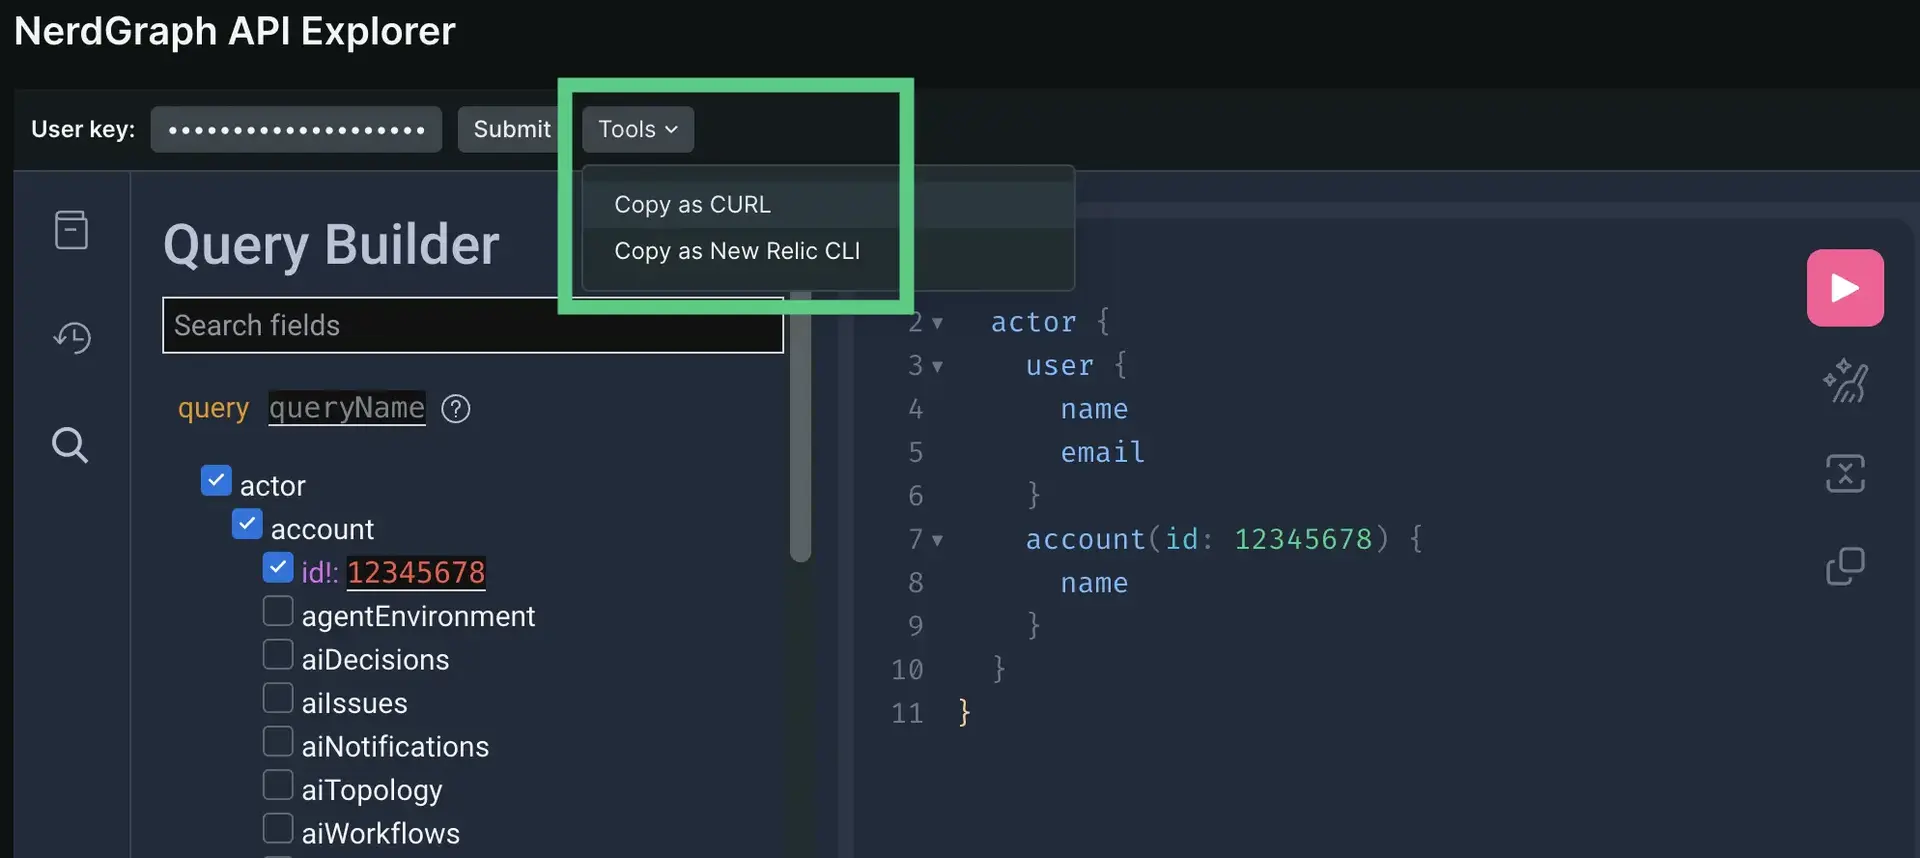
Let's say that you've built a NerdGraph query you're happy with and you want to test it elsewhere. To capture code-ready queries and mutations:
Select the Tools menu.
Copy the query as a curl call or as a New Relic CLI command.
 bash$# curl version$curl https://api.newrelic.com/graphql \>-H 'Content-Type: application/json' \>-H 'Api-Key: API_KEY_REDACTED' \>--data-binary '{"query":"{\n actor {\n user {\n name\n email\n }\n account(id: 12345678)\n }\n}\n", "variables":""}'$$# New Relic CLI version$newrelic nerdgraph query '{$actor {$user {$name$email$}$account(id: 12345678)$}$}'
Next steps
Now you know the basics of composing and testing NerdGraph queries, but how do you turn them into client or server code? Solutions such as the GraphQL Code Generator can help you turn the NerdGraph queries into code for your implementation.
Try creating more complex queries by clicking fields and expanding objects in the query builder (be careful with mutations though, as they could result in changes to your account). Check out some of the example requests in the section below.
For more information on NerdGraph and explore other projects from the developer community, check out Explorer's Hub posts.
Other example requests
Here are some other examples of NerdGraph requests that may be helpful: