Traditional monitoring often forces engineering teams to track isolated service-level metrics, creating a fragmented, "swivel-chair" debugging experience when critical user journeys degrade. Intelligent Workloads evolves the reactive troubleshooting of Transaction 360 into a proactive, self-updating monitoring hub. By leveraging distributed tracing to automatically map your entire architectural estate to a single business transaction, it continuously tracks full-stack dependencies and aligns technical performance with real-time business outcomes (KPIs) as your system changes.
Prerequisites
Before creating Intelligent Workloads, verify that your account meets the following:
Verify that Advanced APM is provisioned for your account in Feature Control Manager
How to create Intelligent Workloads
You can create Intelligent Workloads in three ways, each takes only a few minutes to set up:
New Relic automatically analyzes your application transactions and recommends high-value Intelligent Workloads to create. This is the fastest way to get started with Intelligent Workloads. You can create one Intelligent Workload at a time or create multiple workloads through our bulk creation functionality.
View recommendations
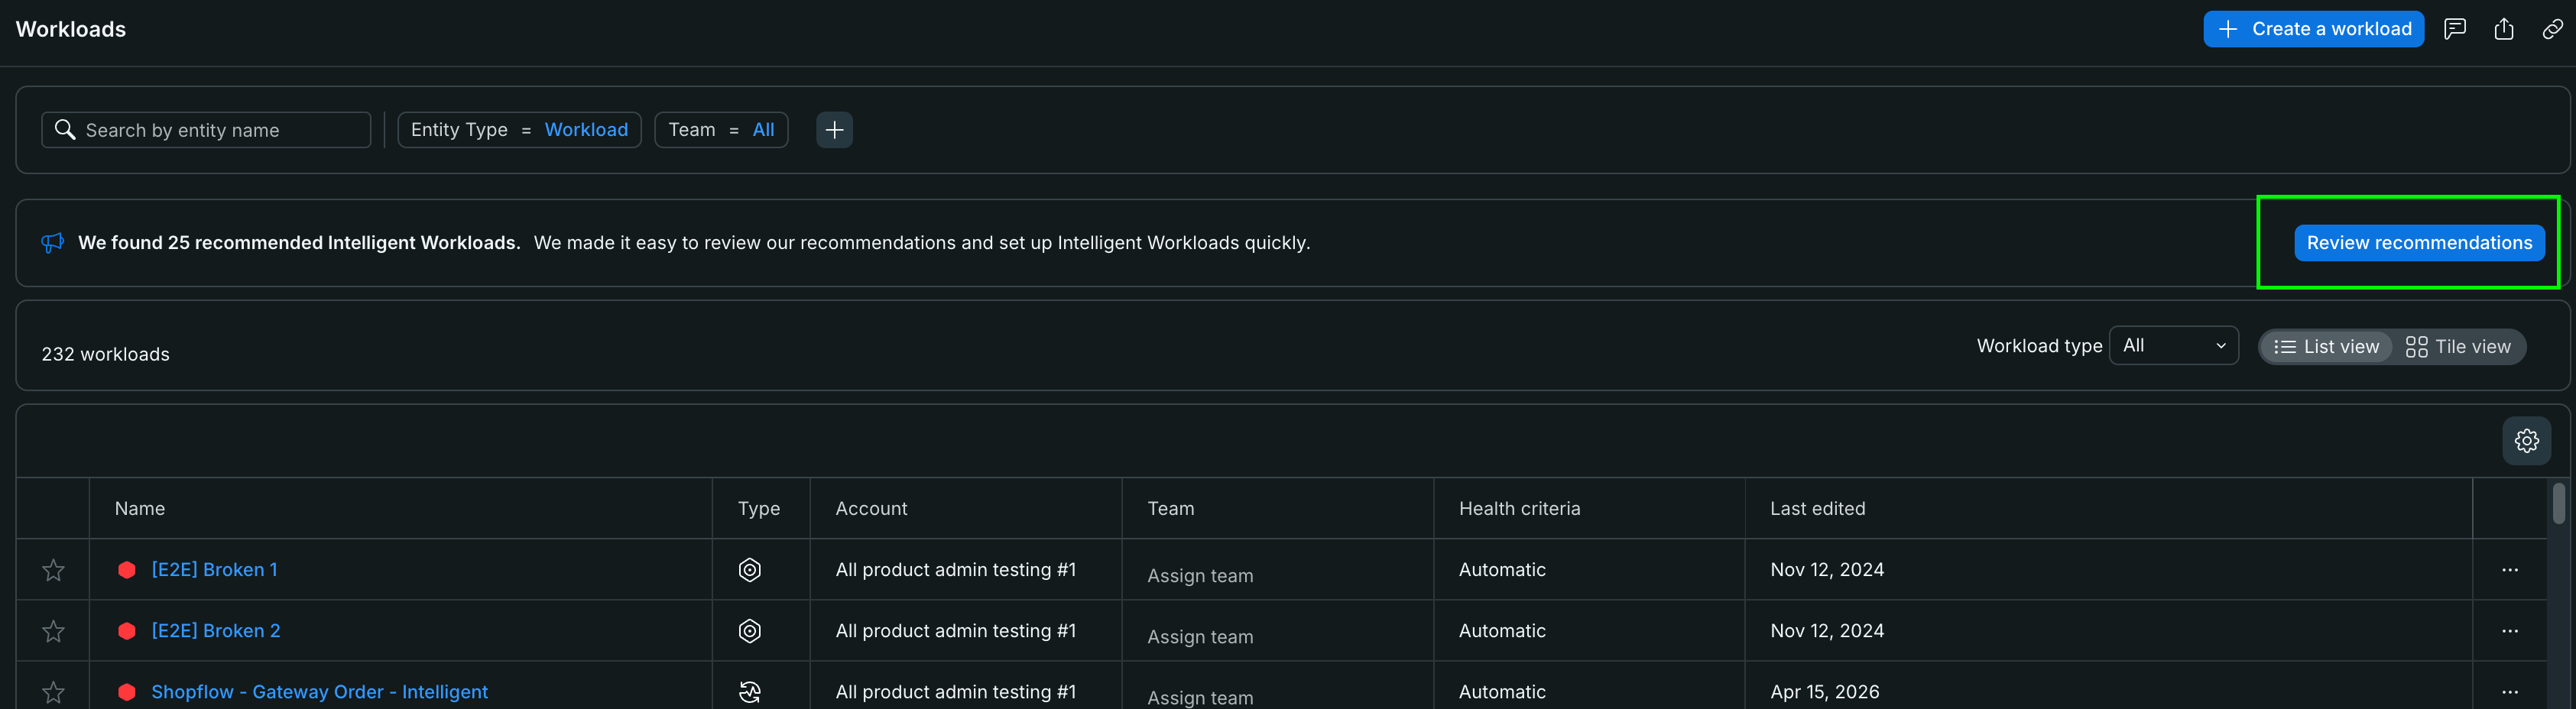
When you navigate to the Workloads page, you'll see a banner at the top if New Relic has found recommended Workloads for you:
Click Review recommendations to open the recommendations modal.
Review and create from recommendations
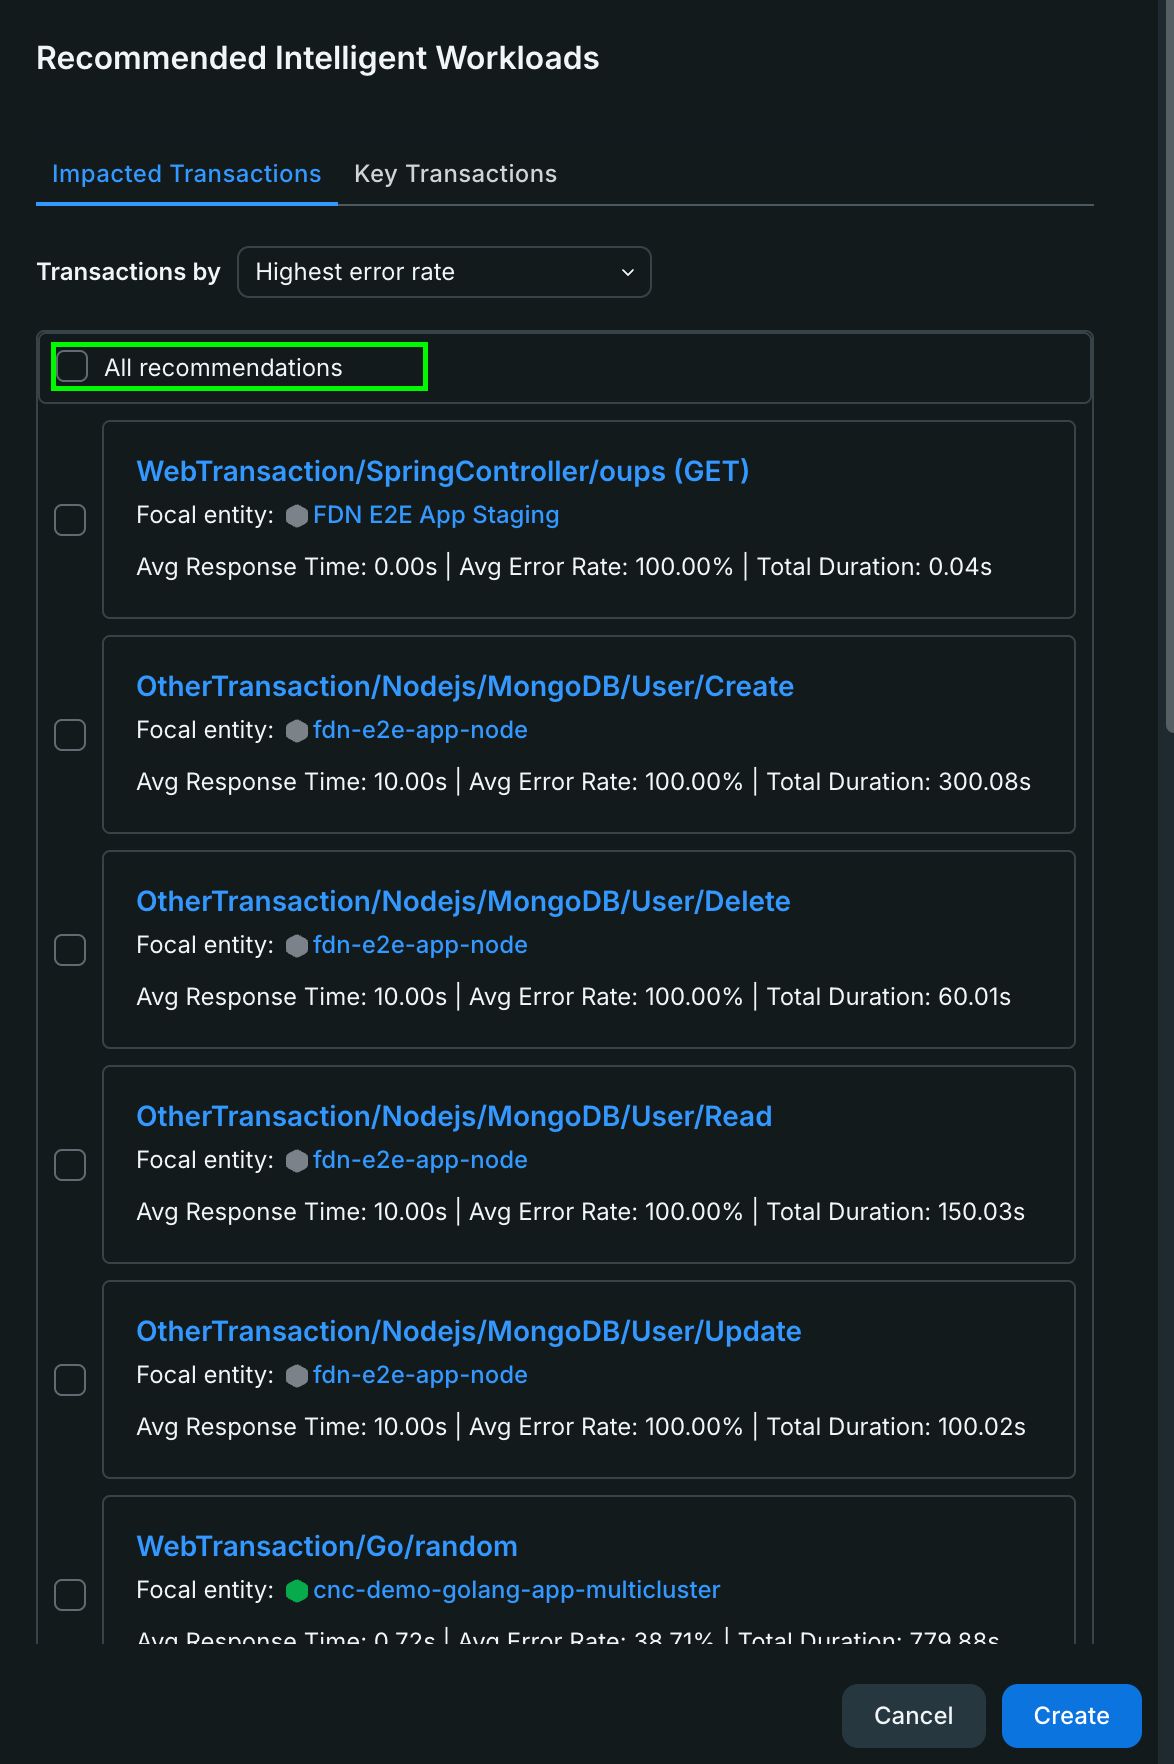
The Recommended Intelligent Workloads modal shows transactions that would benefit from monitoring:
Filter by category: Use the tabs to switch between:
Key Transactions: High-traffic or business-critical transactions
Impacted Transactions: Transactions with performance issues or errors
Sort recommendations: Use the dropdown to sort by:
Highest error rate
Slowest average response time
Most time consuming
Review transaction details
Create workload: Click Create next to any recommendation
When you create from a recommendation, New Relic automatically pre-fills the entity and transaction selection, taking you directly to the Add details step where you can:
Name your workload
Add a description (optional)
Verify the focal service and transaction
Complete the setup
Tip
Creating from recommendations is ideal when you're new to Intelligent Workloads or want to quickly identify which transactions would benefit most from dedicated monitoring.
Bulk create from recommendations
If you want to create multiple Intelligent Workloads at once, use the bulk create option from the recommendations modal. New Relic automatically surfaces candidate transactions and lets you curate them by:
Most time-consuming: Transactions with the highest total processing time
Slowest average response time: Transactions with the worst average latency
Highest error rate: Transactions failing most frequently
Ideal if you already know the specific account, service, and transaction you want to build a workload around using the standard setup wizard.
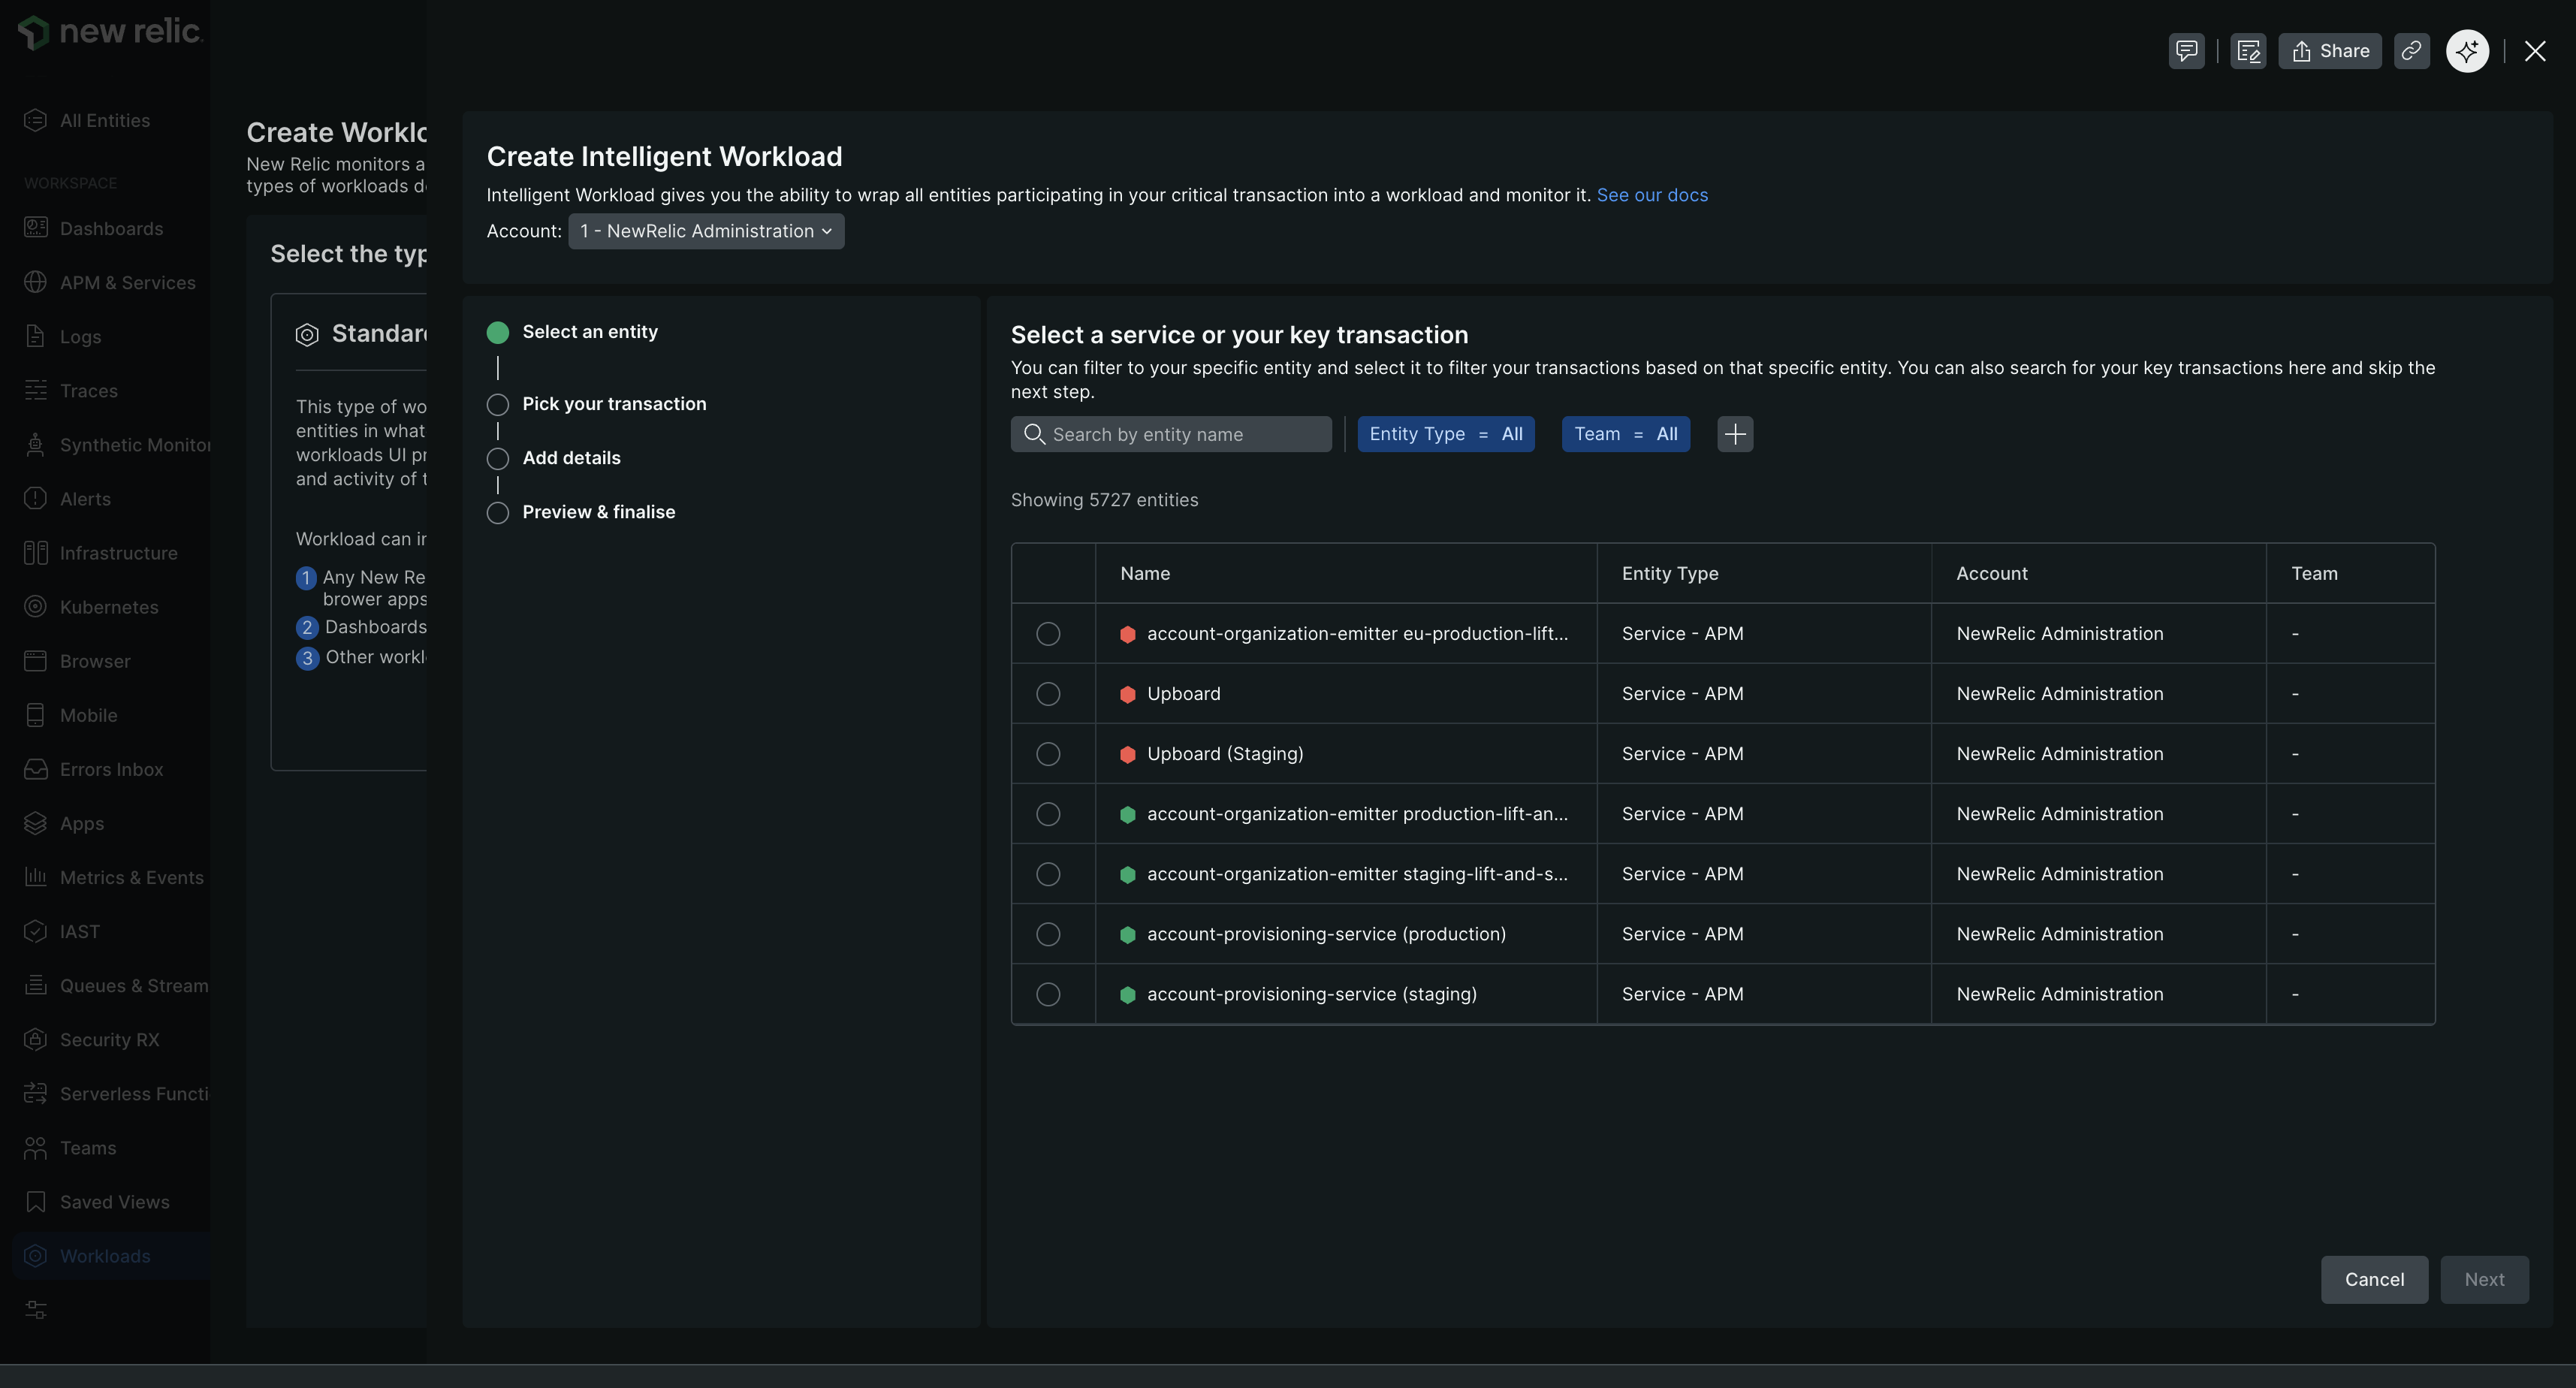
Choose the service or entity that contains your critical transaction:
Search or browse for the entity by name.
Filter by entity type if needed (APM services, browser apps, etc.).
Select the entity that processes your key transaction.
Click Next.
Tip
Choose an entity that is central to your transaction flow. For example, if monitoring a checkout process, select the checkout service rather than a peripheral logging service.
Step 2: Pick your transaction
Select the specific transaction you want to monitor:
Browse the list of transactions for the selected entity.
Use search to find specific transaction names.
Select the transaction that represents your business workflow.
Click Next.
The workload will track all entities that participate in this transaction based on distributed traces.
Important
Infrastructure entities are currently excluded from health tracking due to platform limitations. Only APM services, browser apps, and other instrumented entities are included in workload health calculations.
Step 3: Add details
Provide information about your workload:
Name: Enter a descriptive name (e.g., "Checkout Transaction", "User Authentication Flow")
Description (optional): Add context about what this workload monitors and why it matters
Account: Select the account where the workload will be created. By default, your currently active account is pre-selected. Use the dropdown to change it if you want to create the workload in a different account.
Click Next.
Step 4: Preview & finalize
Review your workload configuration:
Verify the Focal entity is correct.
Confirm the Focal transaction matches your intended workflow.
Review the workload Name and Description.
Click Create Workload.
Your Intelligent Workloads will immediately begin tracking entities participating in the transaction.
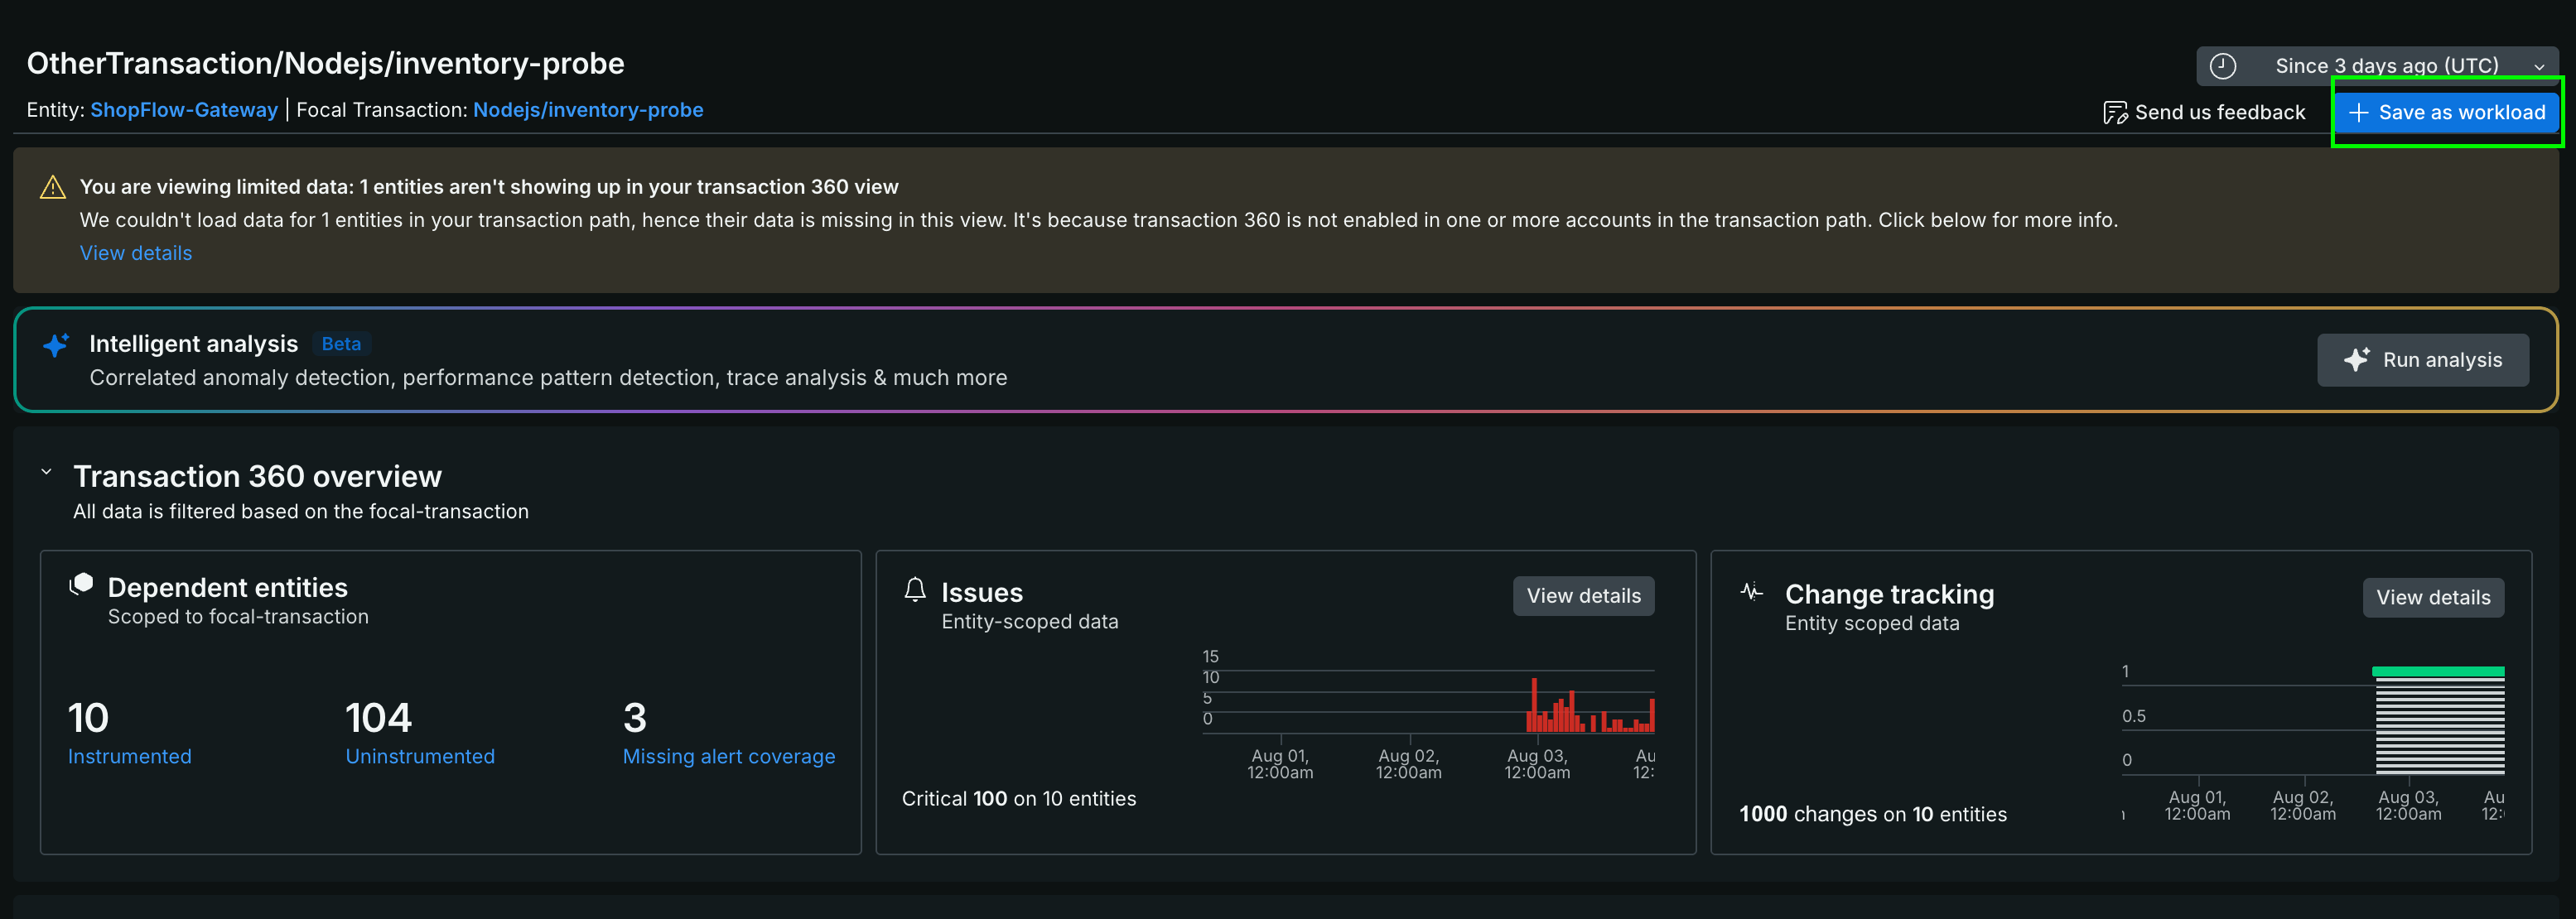
Ideal if you are actively investigating an incident and want to seamlessly save your current transaction view as a permanent, proactive workload.
Select a service that's part of your critical transaction flow.
Navigate to a specific transaction you want to monitor and click Transaction 360.
Click Save as Intelligent Workload.
Enter a descriptive name for the workload.
Click Save.
Tip
Choose transaction names that represent complete business workflows (e.g., "checkout", "user-authentication") rather than individual API calls.
Scope your Intelligent Workloads
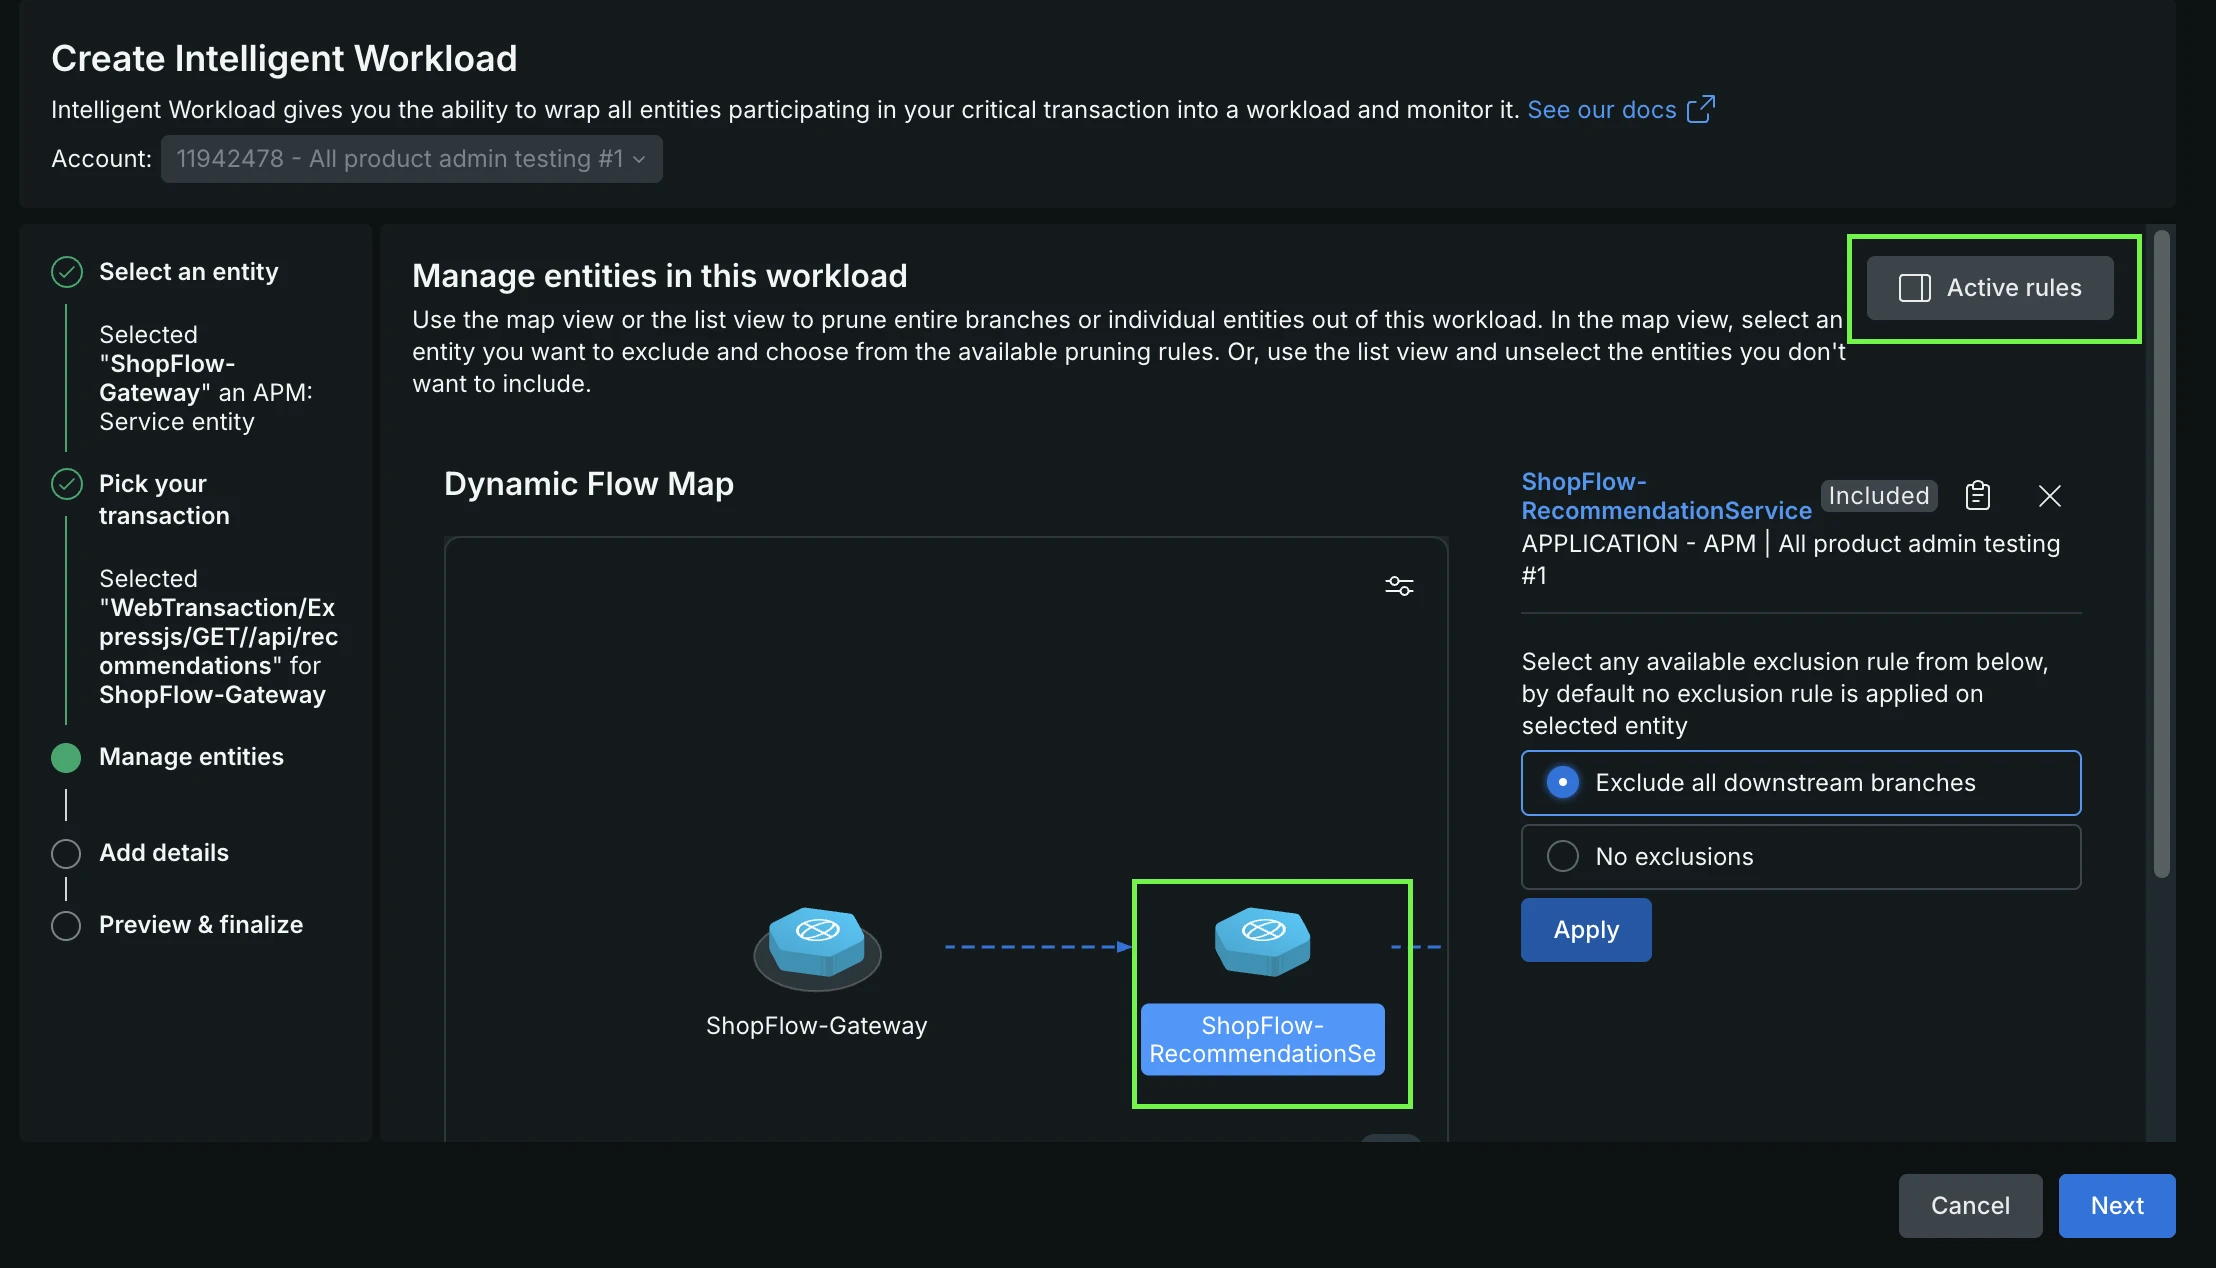
By default, an Intelligent Workload dynamically includes every upstream and downstream service that participates in distributed traces with your focal transaction. If your transaction calls unowned microservices, third-party APIs, or complex fan-out pipeline branches that you do not want impacting your overall workload health, use exclude filtering to prune those dependency paths.
Common scoping use cases:
Prune unowned dependencies: Exclude upstream API gateways or secondary downstream services (such as external payment gateways or coupon microservices) that your team does not directly manage.
Isolate pipeline branches: In complex fan-in and fan-out architectures (such as Kafka message pipelines), trim parallel consumer queues or irrelevant topics to isolate the exact execution branch your team owns.
How exclude filters work:
When adding an exclude filter to your workload graph, configure three parameters:
Target entity: The specific service node on the dependency map where you want to apply the filter.
Direction: Whether to prune dependencies coming into the selected entity (Upstream) or leading out of it (Downstream).
Target entity visibility: Whether to exclude the target entity itself along with all its connections (removing it entirely from the workload graph), or keep the target entity visible while only pruning its further upstream or downstream dependencies.
Because exclude filters are dynamic, any new microservices or connections that appear along an excluded branch in future traces are automatically filtered out without requiring manual updates to your workload.
What's next
Once your Intelligent Workloads are created, explore the core views and tools to get comfortable monitoring your critical customer journeys: