Complete these configuration tasks for each monitored system.
Upload authorization role
Use SAP transaction
PFCG.Go to Role > Upload and upload the file _NEWR_DATA_PROVIDER.SAP from the installation package.
Confirm that the role
/NEWR/DATA_PROVIDERloads.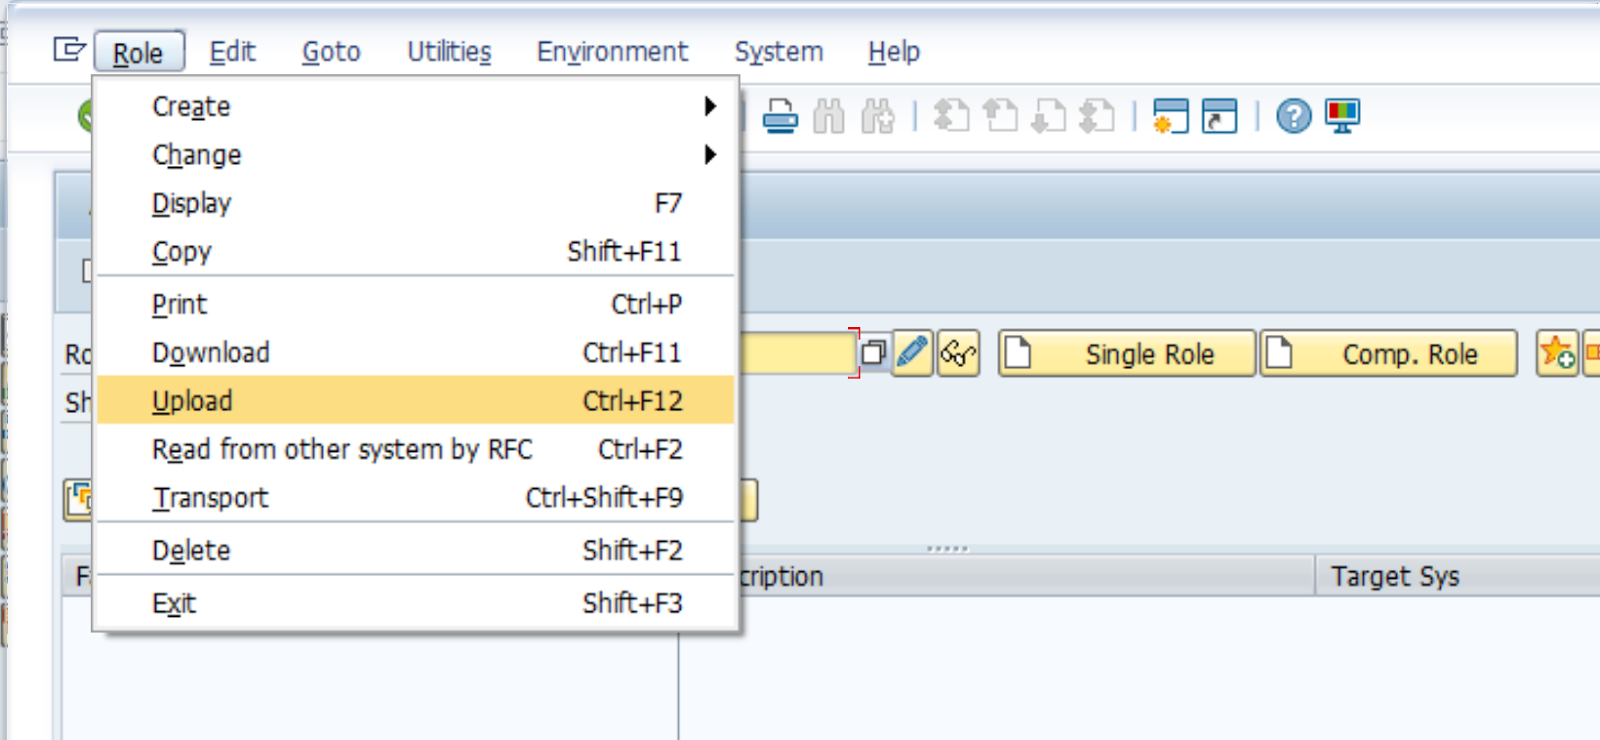
Select the
 icon after the role loads.
On the Authorizations tab, select
Change Authorization Data, and then activate it using the  icon.
icon.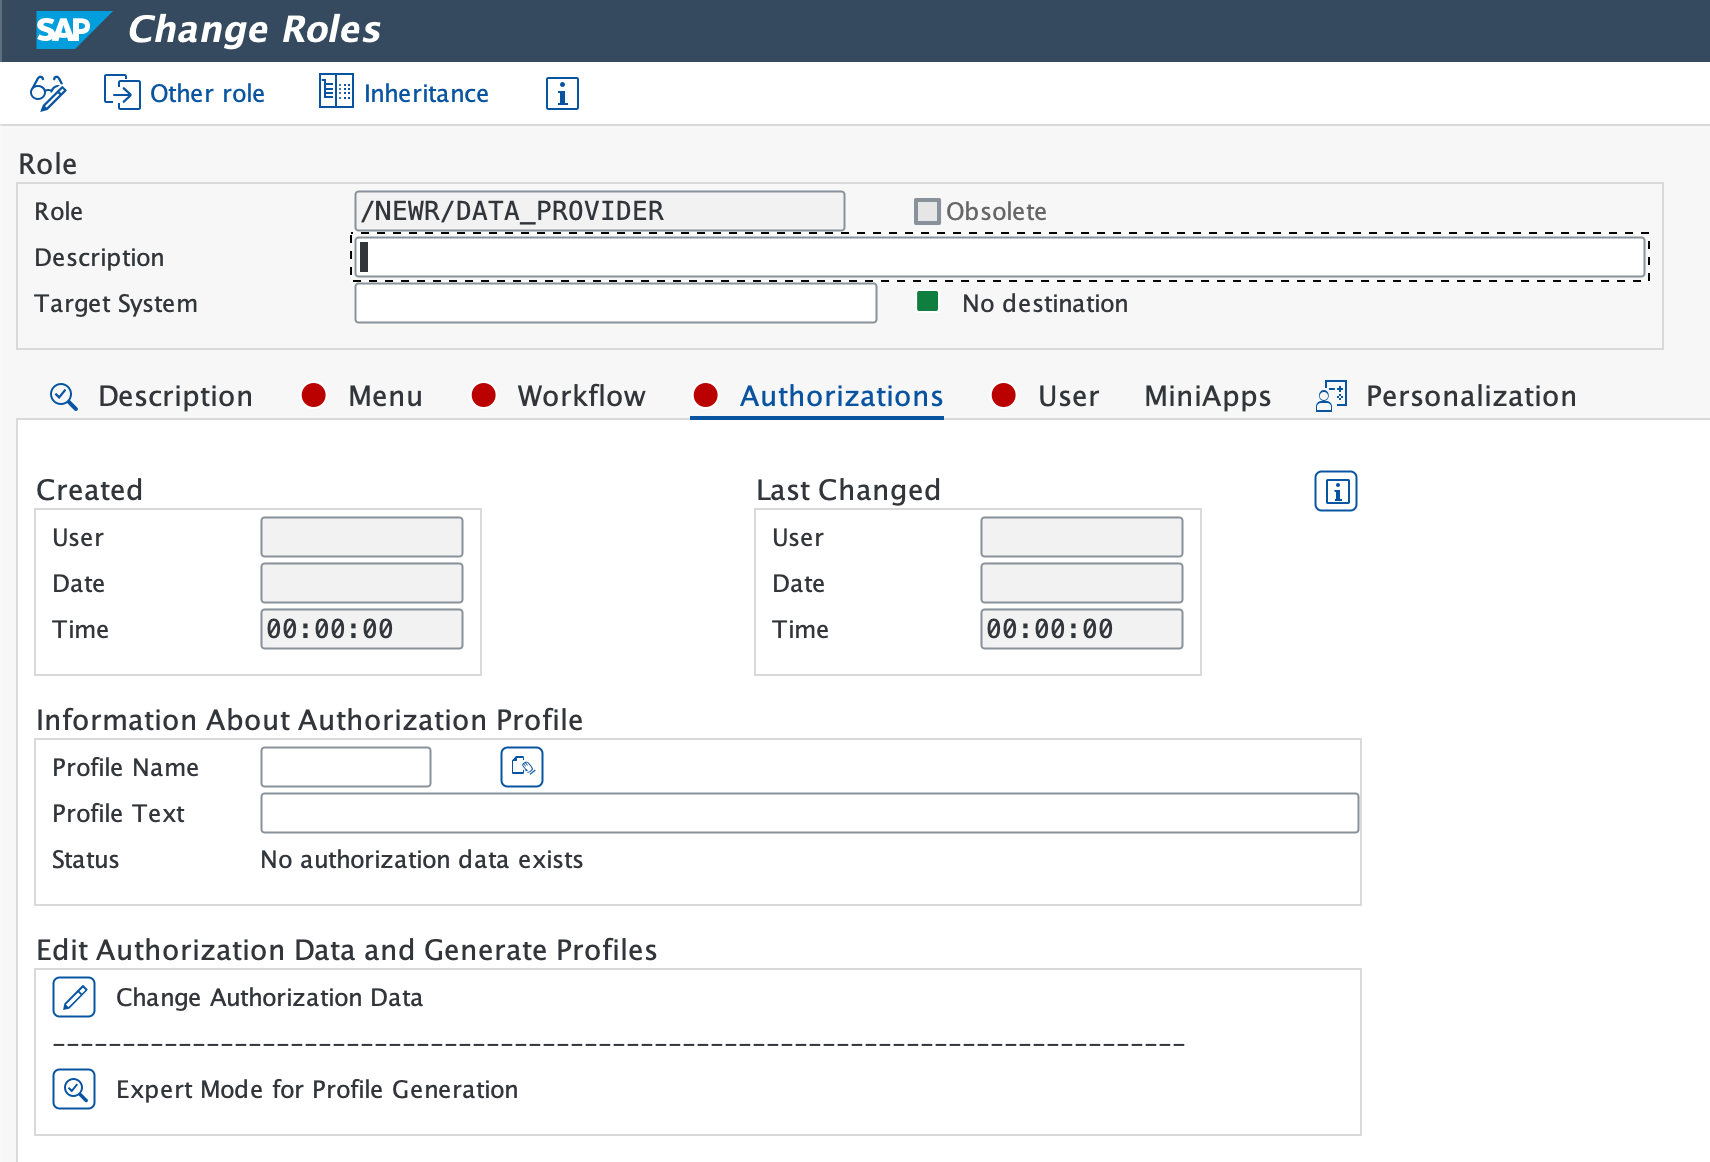
If a profile name is suggested, select the green check icon.
Verify that Profile(s) were updated appears on the status bar.
Important
If you need SLT module monitoring on the system, also upload the /NEWR/SLT_COLLECTOR role from the _NEWR_SLT_COLLECTOR.SAP file in the installation package.
Create New Relic RFC user ID
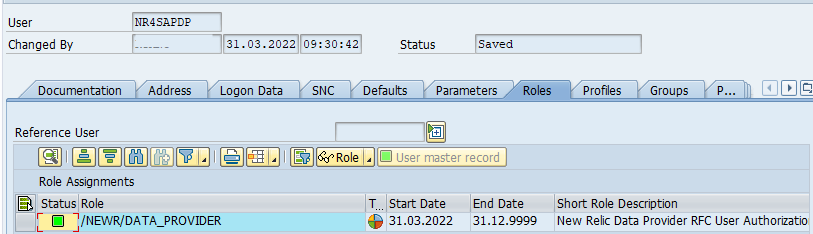
After you activate the authorization profile, use transaction SU01 to create a new RFC user ID (for example, NR4SAPDP). Set the user type to Communication on the monitored (data provider) systems and System on the central monitoring system (CMS). Then add the role /NEWR/DATA_PROVIDER.
Standard RFC destination
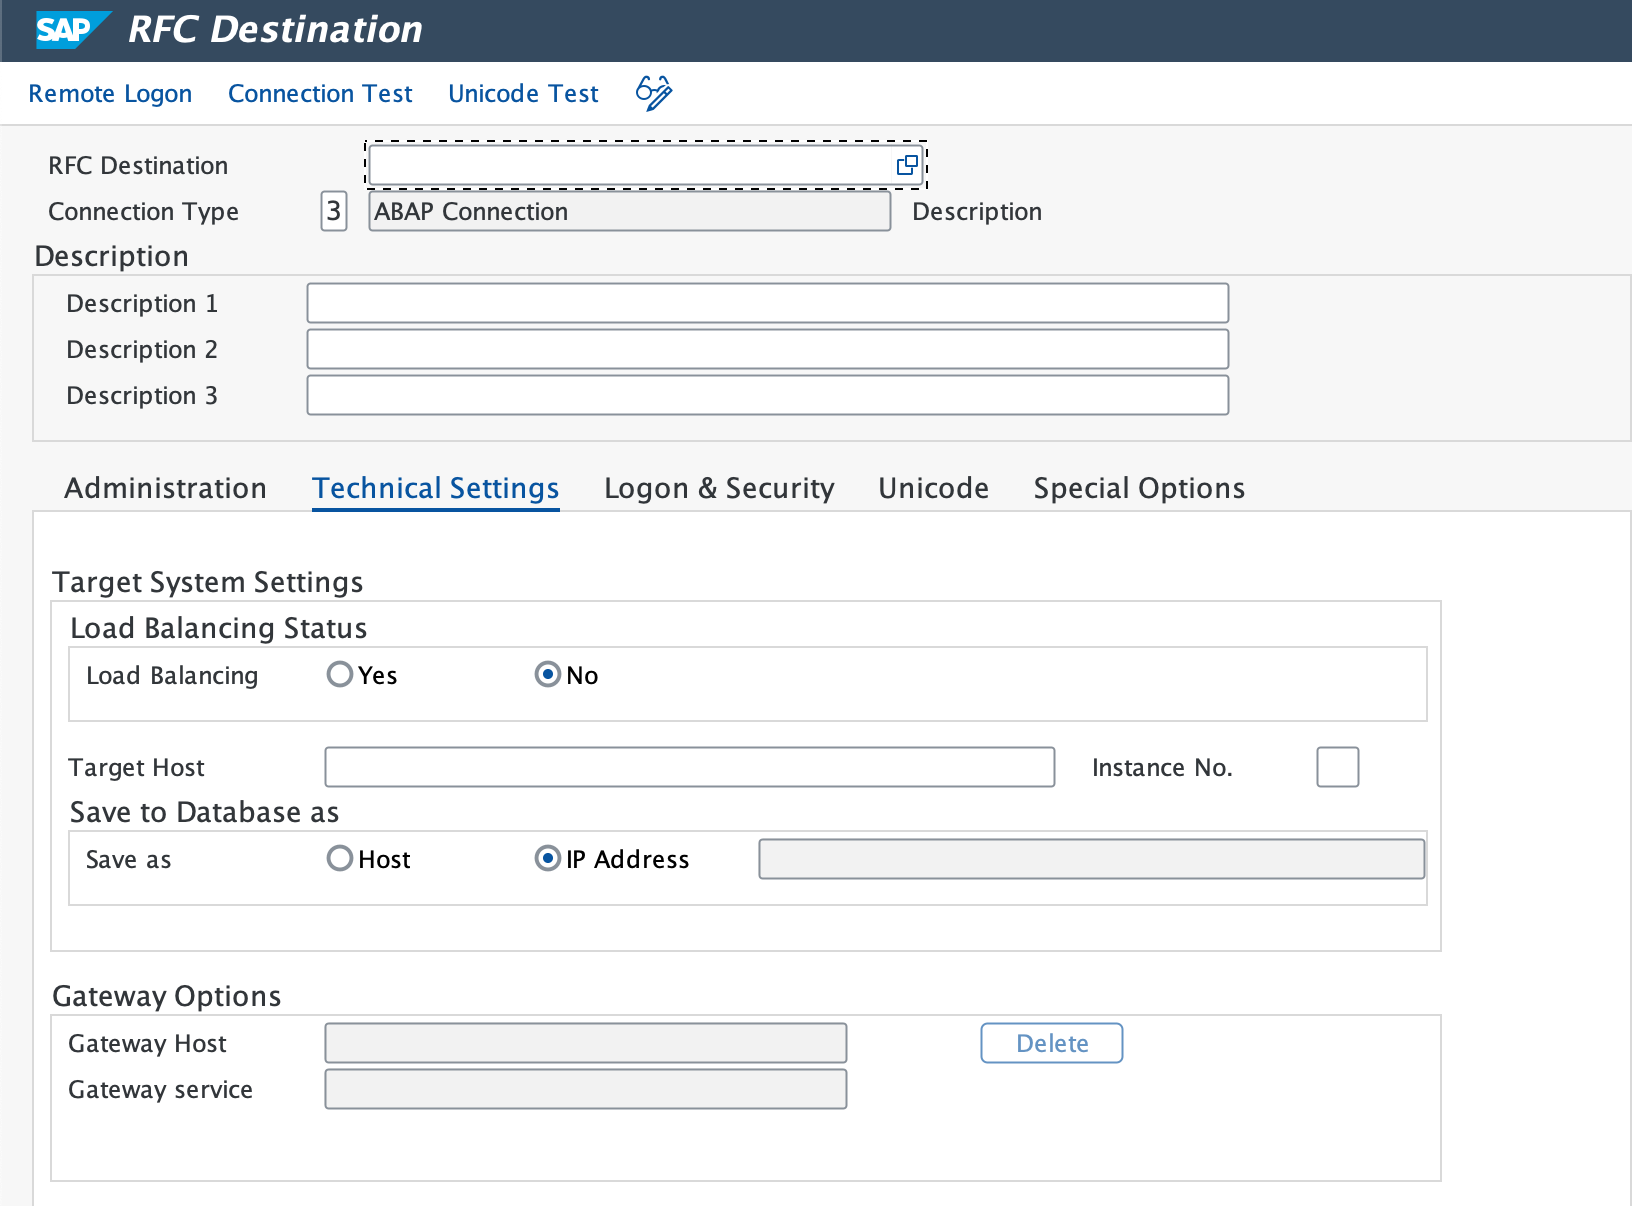
Use transaction SM59 to create an RFC destination for each monitored system.
Select ABAP Connections and then select the Create icon to set up a new RFC destination.
Enter a descriptive RFC Destination name. We recommend:
NR_<SYSID>CLNT<CLNT#>Set Connection Type to
3 - ABAP Connection.On the Technical Settings tab, enter:
- Target Host (fully qualified domain or IP) and Instance No.
- Gateway Host and Service if necessary.
Conseil
Use load balancing whenever possible. It allows data collection to continue even when a single connection goes down. For detailed steps, see Setting Up an RFC Destination with Load Balancing in the SAP documentation.
On the Logon & Security tab, enter the RFC user (
NR4SAPDP) and password.Select Save.
Go to Utility > Test > Connection Test and Authorization Test.
- Expected result: Both tests show successful status.
Set HTTP destination to New Relic cloud
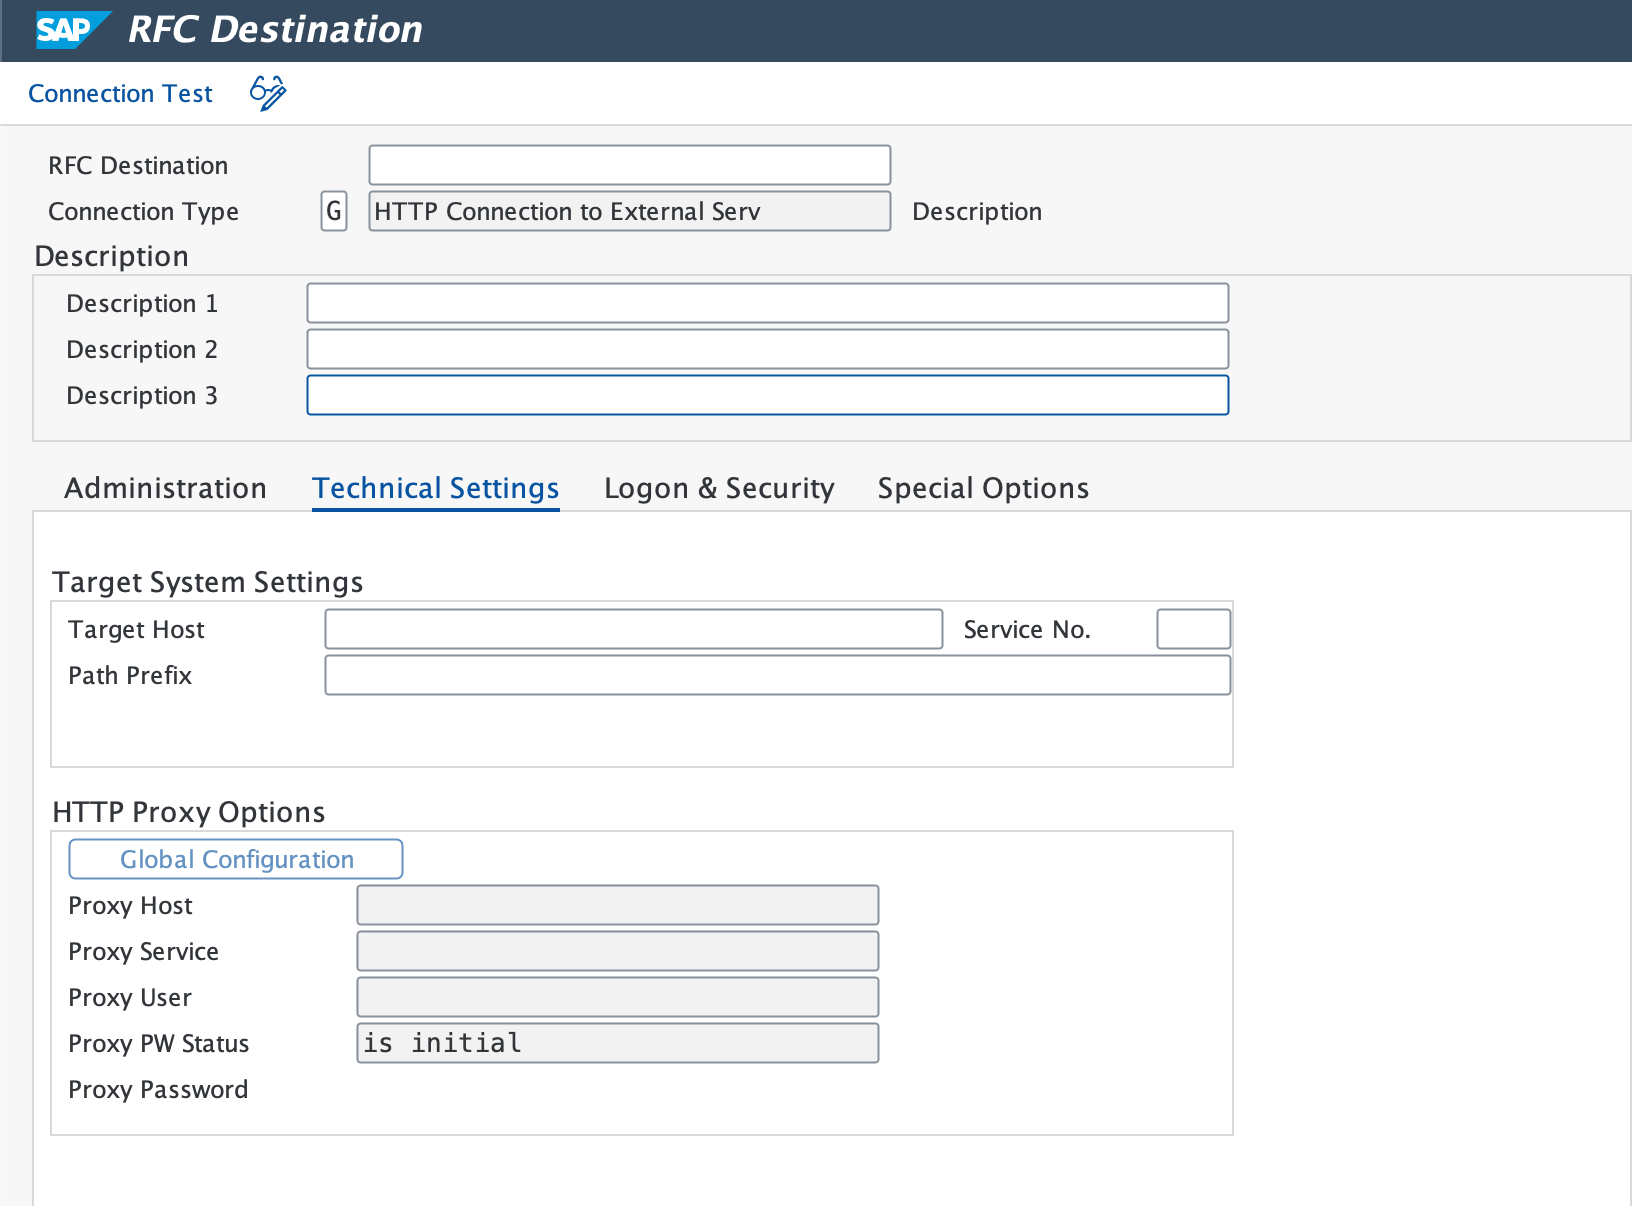
Use transaction SM59 to set up HTTPS connections to the New Relic API endpoints.
Important
Create individual RFC destinations for Events, Logs, Metrics, and Traces separately.
Enter a Destination Name (for example,
NR_API_EVENT).Set Connection Type to
G(HTTP Connections to External Server).Enter Target Host, Service No. as 443 (see standard port for HTTPS), and Path Prefix (see installation readiness checklist for details).
If you need a proxy, configure it on the Technical Settings tab.
On the Security Options tab, select the Active option for SSL.
If the SSL certificate isn't configured yet, download the root and intermediate certificates from the New Relic endpoint in your browser and import them into SAP using transaction
STRUST.Select Connection Test to verify the connection.
- Expected result: A successful connection prompts you to enter logon data.
- If test times out: A firewall is likely blocking the connection. Consult your network team to ensure access is granted to the New Relic domains.
At the logon prompt, select Cancel to proceed. An HTTP 4xx response code screen confirms the connection is working.
Repeat this procedure for all New Relic API endpoints.
Cloud (BTP) RFC destination
Select the tab for your service:
Open the downloaded Service Key to identify and record the
clientId,clientsecret, andtokenurl.Navigate to the URL specified in your service key using a web browser.
From that page, obtain the SAP on demand, Digicert global, and Digicert root certificates.
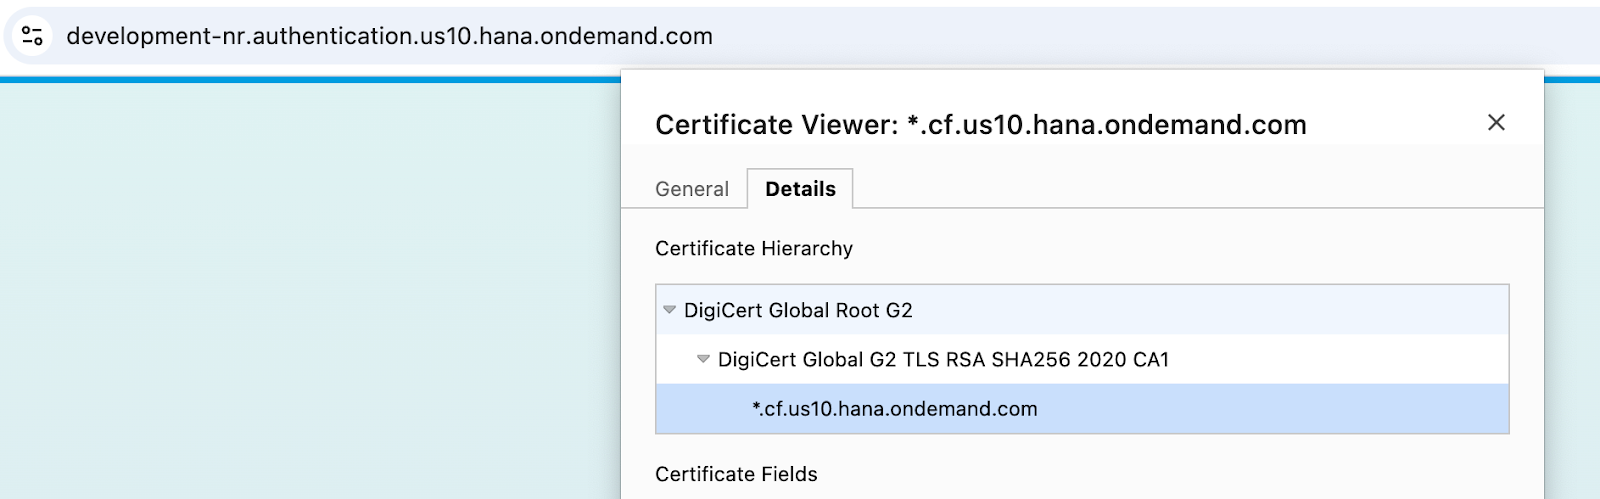
Navigate to transaction code
STRUSTand select SSL Client (Standard) while in edit mode.Individually upload the three certificates, select Add to Certificate List for each, and then save your changes.
Navigate to Tcode
SMICM, then select Administration > ICM > Exit Soft > Global. Executing this action triggers a restart of all ICM processes within the system.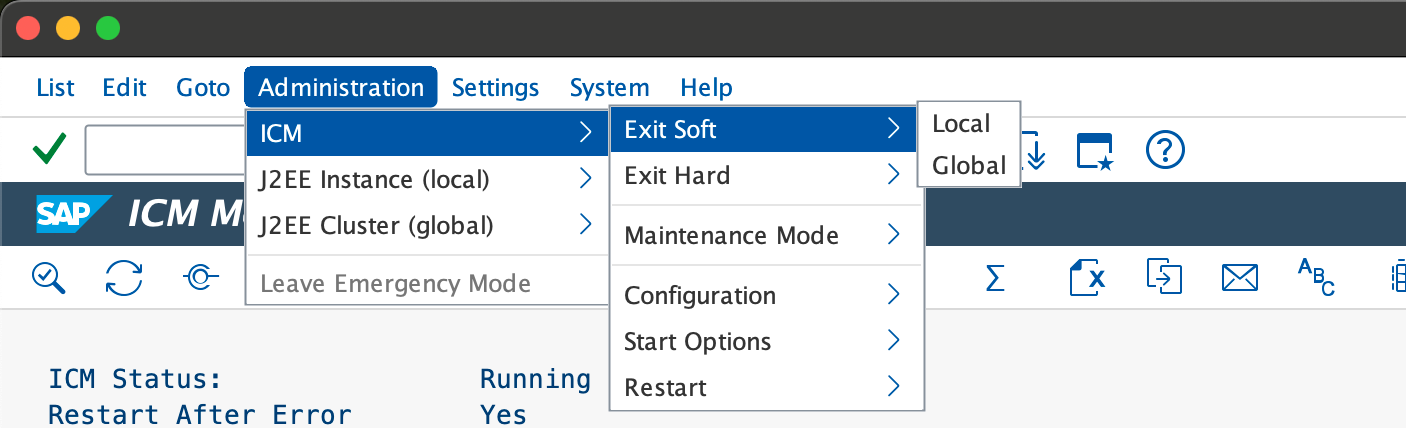
Access the SAP system and navigate to transaction code
SM59, then establish a new RFC connection within the HTTP Connections to External Server category.Configure the destination by dividing the token URL into its respective host and path prefix components.
Set the service number to
443and modify the path prefix by appending?grant_type=client_credentials.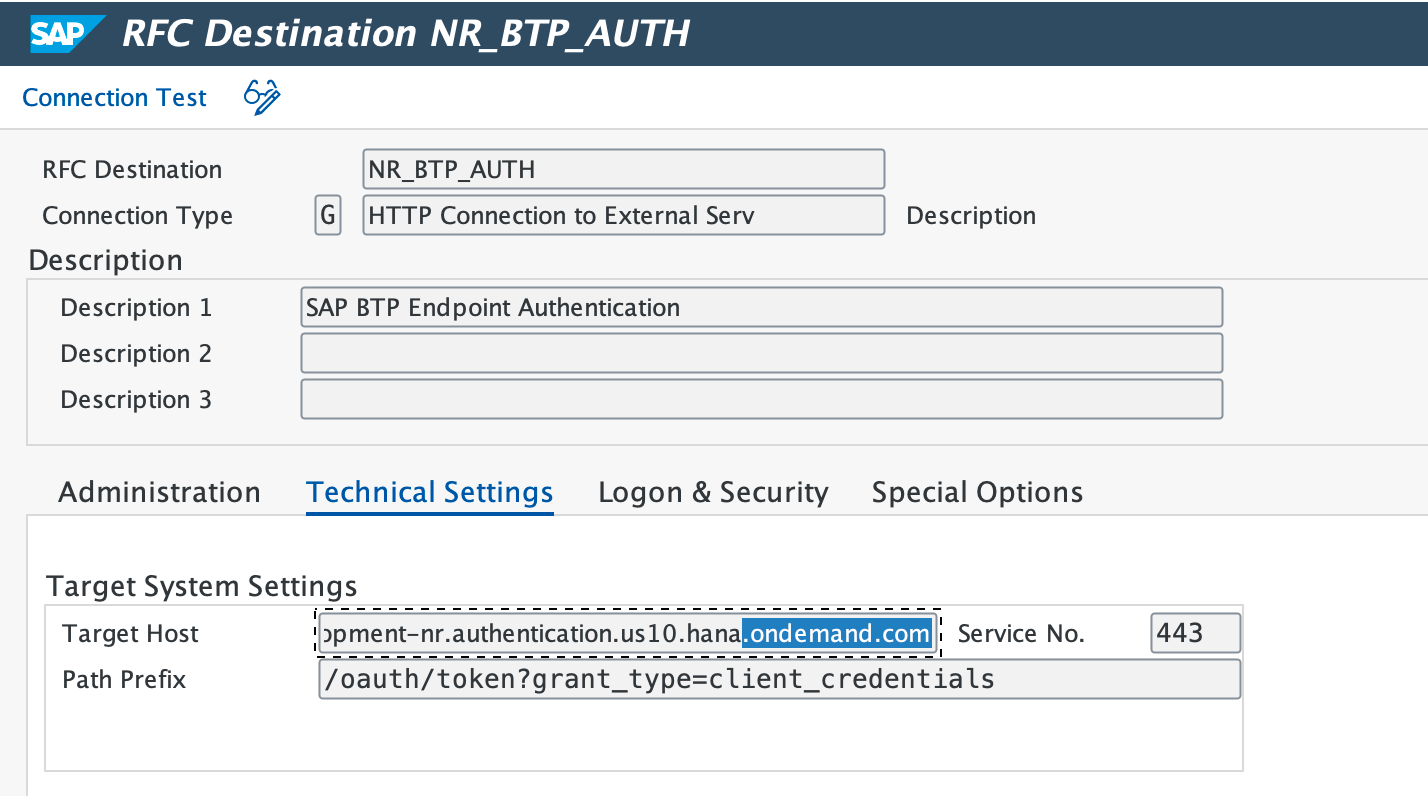
On the Login & Security tab, select Basic Authentication and enter
clientIdandclientsecretas the username and password.Set Secure Protocol status to Active and save the configuration.
Select Connection Test.
Note the
clientId,clientsecret, andurlfrom the downloaded Service Key.Go to the url in a web browser and download the Digicert root, global, and SAP on demand certificates.
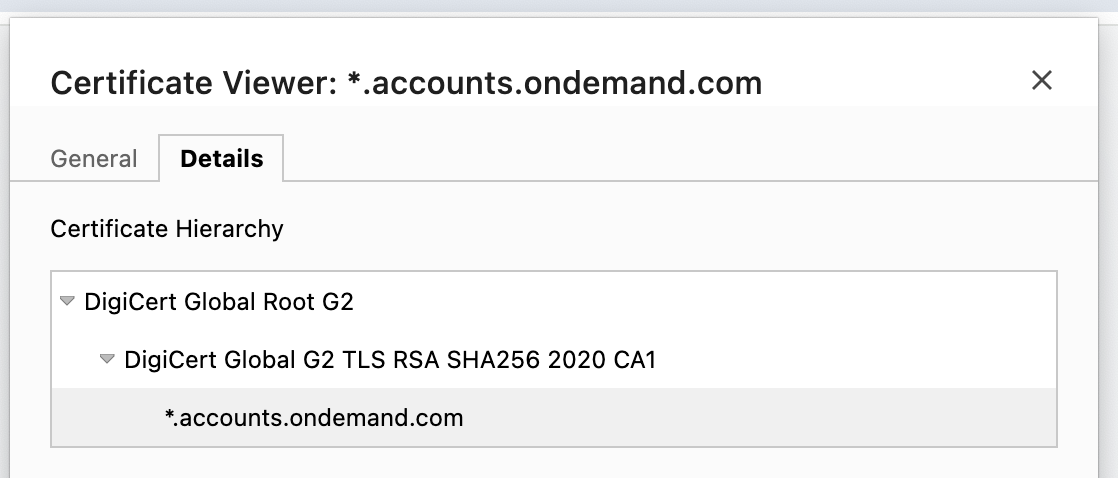
Navigate to transaction code
STRUSTand select SSL Client (Standard) while in edit mode.Individually upload each of the three certificates, then select Add to Certificate List and save your changes.
Navigate to Tcode
SMICM, then select Administration > ICM > Exit Soft > Global. Executing this action triggers a restart of all system ICM processes.Access transaction code
SM59after logging into the SAP system, then establish a new RFC connection under the HTTP Connections to External Server category.Configure the Target Host with the appropriate URL and set the Service No. to
443. Set the Path Prefix to/oauth/token?grant_type=client_credentials.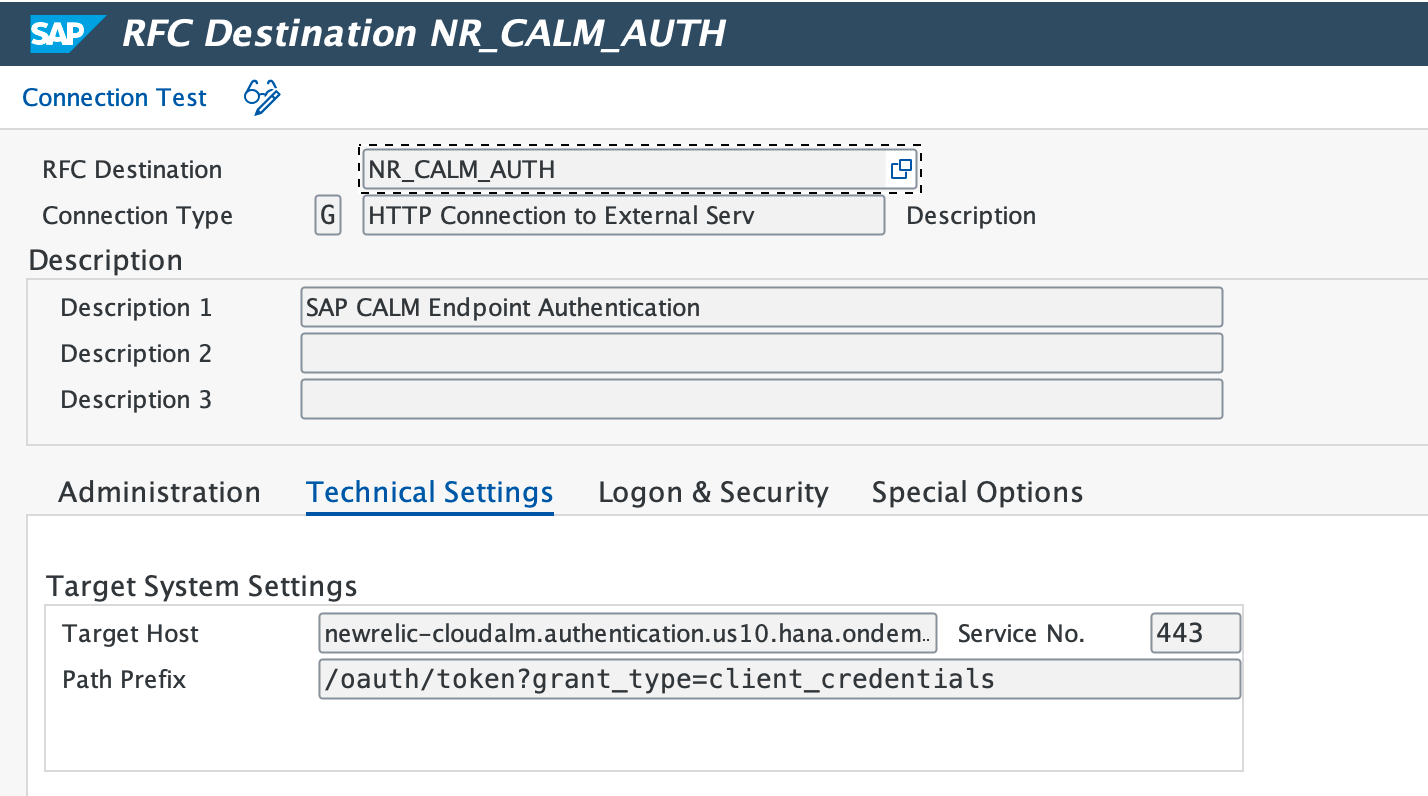
Navigate to the Login & Security tab and choose Basic Authentication in the Login with user section. Provide the
clientIdas the username and theclientsecretas the password.Locate the Secure Protocol status below and set it to Active.
Apply the configuration changes by saving, then select Connection Test.
Create database connection
Use transaction DBACOCKPIT to define the remote HANA Database connections. In the left pane, double-click Database Connections, then select Add to create a new connection.
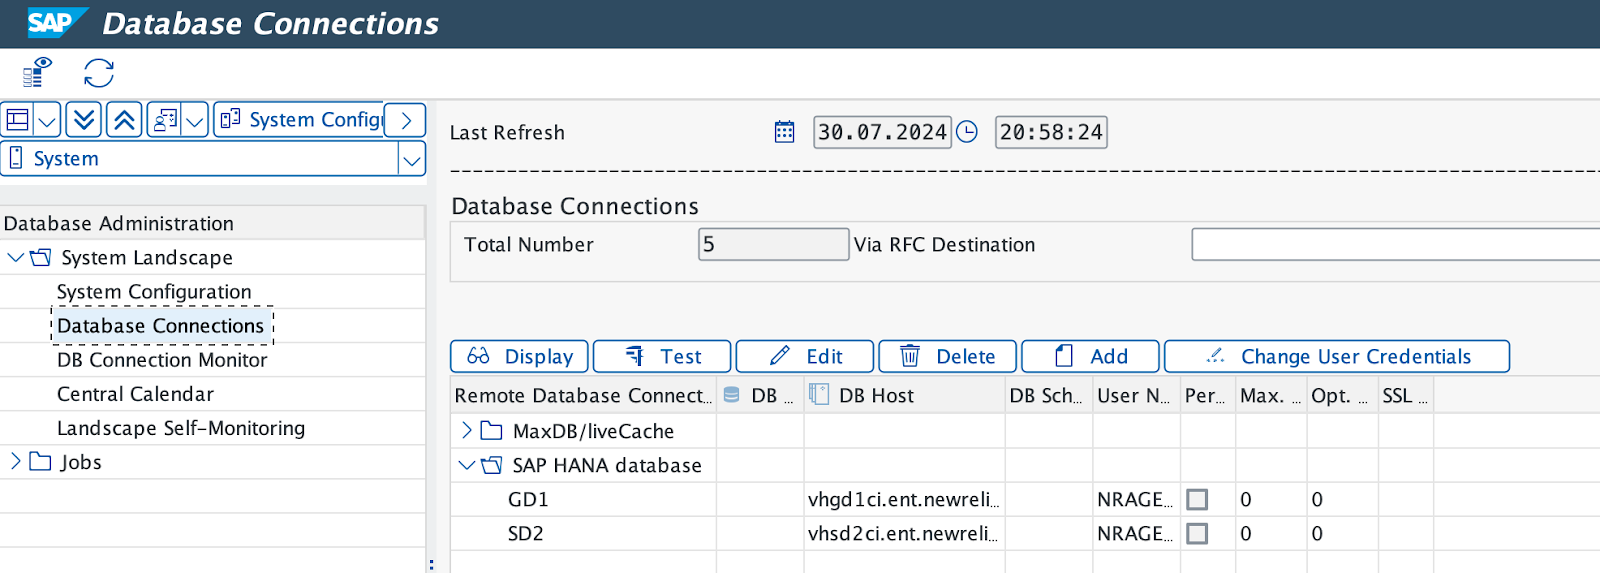
Under Database Details, perform the following steps:
Enter the Connection Name (we recommend using the SAP system ID).
Select HANA Database as the designated Database System.
Provide a database user ID (
NRAGENTis the recommended ID), then enter and confirm your password.Enter the Database Host and the SQL Port.
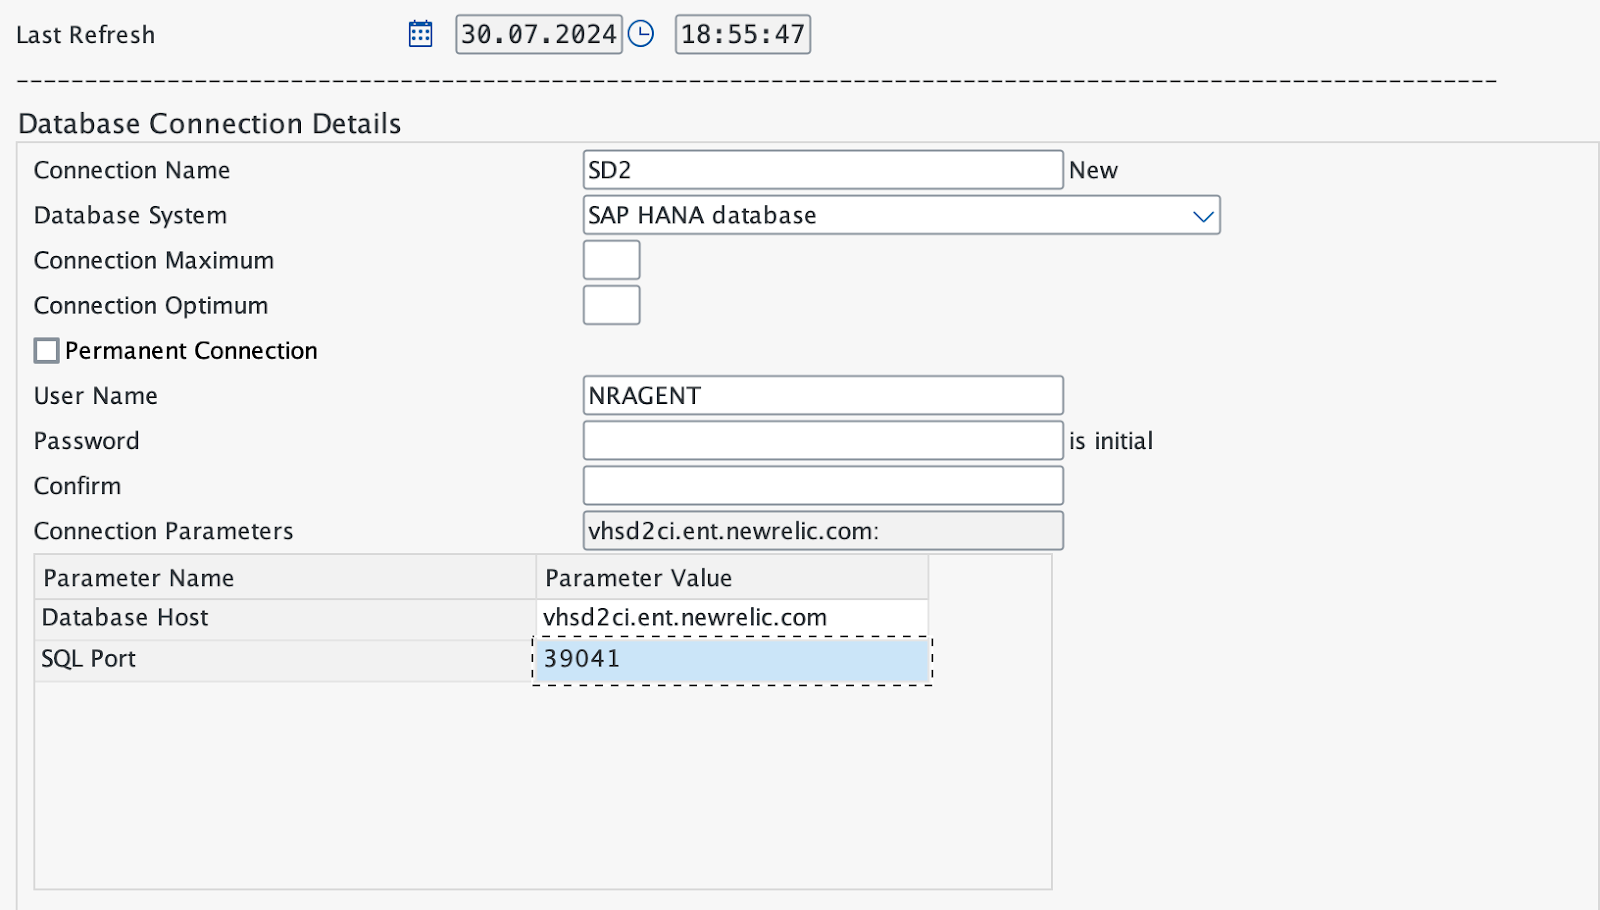
After saving your entries, select Test to verify the connection to the database.
- Expected result: Connection test shows successful status.